
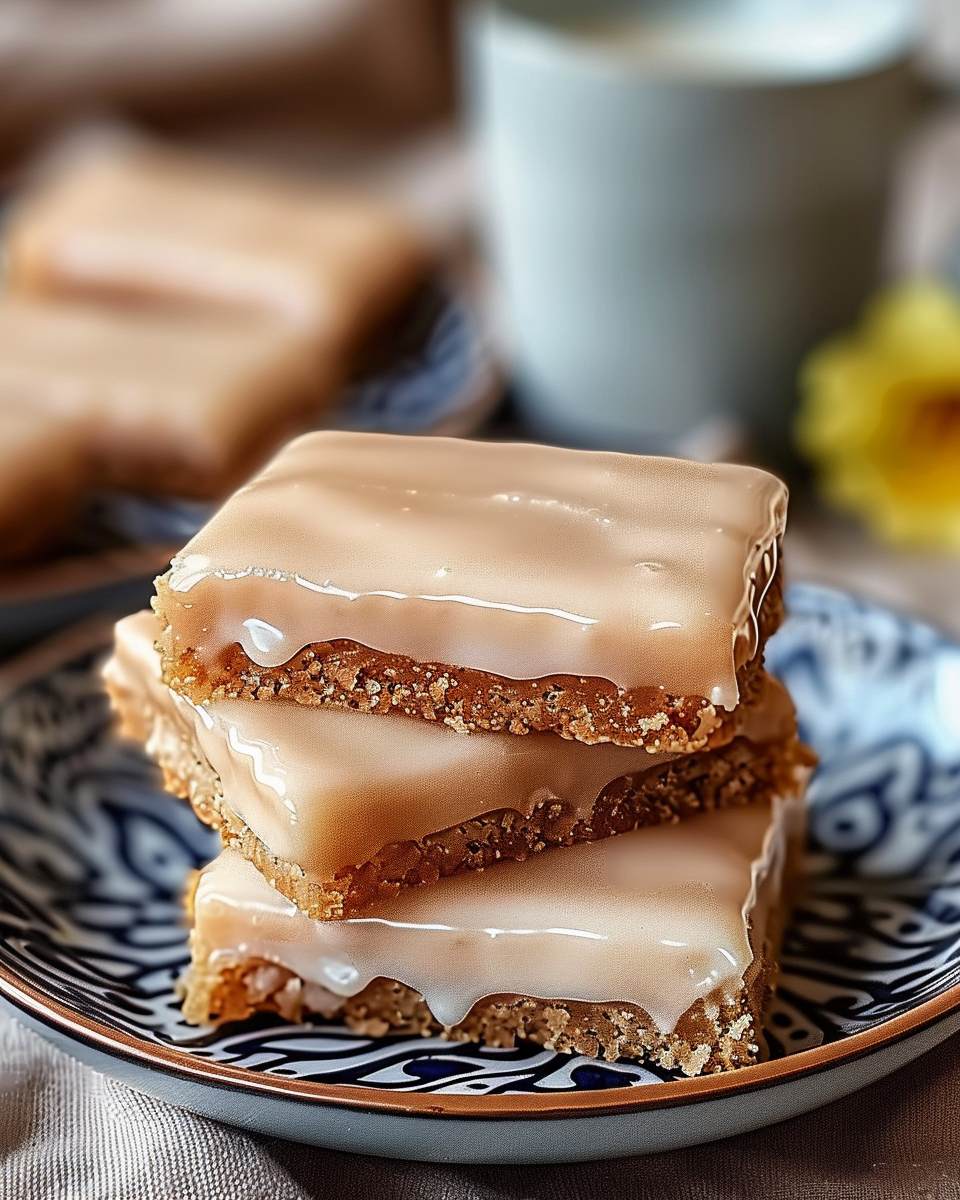
Soft Baked Maple Donut Bars

Tender, cake-like maple bars with a delicate glaze — breakfast bliss in every square. Simple to make, perfect for mornings and gatherings.

This riff on classic maple bars is my weekday and weekend secret weapon. I first made these during a sleepy Sunday morning when I wanted the indulgence of bakery maple bars without the deep frying or the long line at the corner shop. The result is a soft, cake-like bar with warm notes of cinnamon and pure maple that bakes in a rectangular pan and slices into generous squares — a perfectly portable breakfast or coffee-time treat. The texture is tender and lightly crumbed, never heavy, and the thin sheen of glaze gives just enough sugary snap to contrast the pillowy interior.
What makes these bars special is how approachable they are: ordinary pantry items combine with a splash of good maple syrup to create something that tastes like it took far more time and technique than it actually does. I like to make a pan on Saturday morning for the week; the kids love them with butter and jam, while guests appreciate them with a steaming cup of dark coffee. Over the years, I’ve learned a few shortcuts and tips that keep the crumb soft and the glaze glossy — I’ll share those below so you can get bakery-quality results at home.
Why You'll Love This Recipe
- Ready in about 35 minutes from start to finish — mix, bake, and glaze for a fast morning treat that still feels special.
- Uses pantry-friendly ingredients: all-purpose flour, granulated sugar, baking powder, cinnamon, eggs, butter, milk, and pure maple syrup; no yeast or complicated steps.
- Soft, cake-like texture that stays tender for days when stored correctly — great for make-ahead breakfasts and lunchbox treats.
- Glaze is quick to whisk and customizable; swap milk for cream or vanilla for maple extract to change the finish.
- Perfect for entertaining: slice into bars or squares and serve on a tray for brunch, potlucks, or holiday mornings.
- Versatile: easily adapted to dairy-free or reduced-sugar versions by swapping milk and butter and adjusting sweeteners.
In my kitchen these bars always make an appearance around autumn, when I’m reaching for warmer flavors. Family members often request them for weekend brunches — there’s something about the maple aroma that draws everyone to the table. Over time I’ve experimented with different glazes and found this simple powdered-sugar glaze to be the best balance of sweet and silky without overpowering the maple in the crumb.
Ingredients
- All-purpose flour (2 cups): Spoon into your measuring cup and level it off for accuracy; unbleached flour from King Arthur or Gold Medal yields a tender crumb. Flour provides structure and the gentle chew you expect from a soft bar.
- Granulated sugar (1 cup): Standard white sugar gives a clean sweetness that lets the maple shine. If you prefer deeper flavor, use light brown sugar for a molasses note but expect a slightly denser texture.
- Baking powder (2 teaspoons): The leavening agent that creates lift. Make sure it’s fresh — if it’s older than six months, replace it for best rise.
- Salt (1/2 teaspoon): Balances the sweetness and enhances maple flavor. Table salt or fine sea salt works fine.
- Ground cinnamon (1 teaspoon): Freshly ground gives the best aroma; it brightens the batter and pairs beautifully with maple.
- Eggs (2 large, room temperature): Room-temperature eggs emulsify better and create a lighter texture. Use large eggs for consistent volume.
- Maple syrup (1/2 cup): Pure maple syrup is recommended — the real deal brings complex caramel and tree notes that imitation syrups can’t match.
- Milk (1/2 cup): Whole milk yields the richest crumb, but any non-dairy milk such as oat or almond will work for a dairy-free alternative.
- Butter (1/4 cup, melted): Adds tenderness and flavor; cooled slightly so it doesn’t cook the eggs when combined.
- For the glaze — Powdered sugar (1 cup) and milk (2 tablespoons): Whisk to a pourable consistency and use a teaspoon of maple syrup or vanilla if you want extra depth.
Instructions
Step 1 — Preheat and prepare the pan: Preheat the oven to 350°F. Line a 9x13-inch baking pan with parchment paper leaving an overhang on two sides for easy removal; lightly grease the parchment. Proper pan preparation ensures even edges and easy slicing after cooling. Step 2 — Mix dry ingredients: In a large bowl, whisk together 2 cups all-purpose flour, 1 cup granulated sugar, 2 teaspoons baking powder, 1/2 teaspoon salt, and 1 teaspoon ground cinnamon until evenly combined. Sifting is optional but helps eliminate lumps and aerates the mixture. Step 3 — Whisk wet ingredients: In a separate bowl, beat 2 large room-temperature eggs lightly, then add 1/2 cup maple syrup, 1/2 cup milk, and 1/4 cup melted and slightly cooled butter. Whisk until the mixture is homogenous and slightly frothy — this helps incorporate air for a lighter crumb. Step 4 — Combine and fold: Pour the wet ingredients into the dry and fold gently with a rubber spatula until just combined. Avoid overmixing; stop when you no longer see dry streaks. Overworking develops gluten and will make the bars tougher rather than tender. Step 5 — Bake until set: Scrape the batter into the prepared pan and smooth the top. Bake at 350°F for 18–22 minutes or until the center springs back slightly and a toothpick inserted in the middle comes out with a few moist crumbs. The top should be lightly golden but not overly browned. Step 6 — Cool and make glaze: Cool the baked slab in the pan on a wire rack for 15 minutes. Meanwhile, whisk 1 cup powdered sugar with 2 tablespoons milk until smooth and pourable. Add a pinch of salt or 1/2 teaspoon vanilla or maple extract if desired to deepen flavor. Step 7 — Glaze and slice: Use the parchment overhang to lift the slab out of the pan and place it on a wire rack set over a sheet pan. Pour the glaze over the warm bar and spread evenly with an offset spatula. Let the glaze set for 15–20 minutes, then slice into 12 equal bars using a serrated knife for clean edges.
You Must Know
- High-quality pure maple syrup makes a noticeable difference in flavor; avoid pancake syrups for authenticity.
- Bars keep at room temperature, covered, for up to 2 days and up to 5 days refrigerated — bring to room temperature before serving for best texture.
- Freeze unglazed bars for up to 3 months. Thaw overnight in the fridge and glaze just before serving for fresh results.
- Each bar contains roughly 270 calories and about 37 grams of carbohydrates — a satisfying, indulgent breakfast rather than a low-calorie option.
- These bars are not deep-fried like traditional donut bars, so they’re less oily but still deliver that comforting maple-dough experience.
My favorite thing about these squares is how they transport — I’ve packed them for picnics, ferrying soccer-team breakfasts, and as a treat at book club. Friends always ask for the recipe, and I love telling them the secret: good maple and gentle mixing. That combination keeps the crumb soft while letting maple sing through every bite.
Storage Tips
Store glazed bars in a single layer, loosely covered with plastic wrap or in an airtight container to prevent the glaze from becoming sticky. At room temperature they maintain a good texture for 48 hours; refrigerate for up to 5 days, placing parchment between layers if you stack them. For long-term storage, freeze unglazed bars individually on a sheet pan until firm, then transfer to a freezer bag for up to 3 months. Defrost overnight in the refrigerator, warm briefly in a low oven if you like, and glaze just before serving for a freshly finished experience.
Ingredient Substitutions
For dairy-free: swap the butter for refined coconut oil or plant-based margarine and use oat or almond milk instead of cow’s milk. For lower-sugar options: reduce granulated sugar to 3/4 cup and use a darker maple syrup to compensate for flavor; note the texture will be slightly denser. To make them gluten-free: replace the all-purpose flour with a 1-for-1 gluten-free baking blend that contains xanthan gum. Remember to check the baking powder label if you need a gluten-free guarantee.
Serving Suggestions
Serve warm or at room temperature alongside strong coffee, chai, or steamed milk. For brunch plating, top each bar with a spoonful of whipped cream or Greek yogurt and a sprinkle of toasted pecans for texture contrast. They pair well with fruit-forward items like poached pears or roasted apples, especially in fall. For a special touch, drizzle a little extra warm maple syrup or a salted-butter sauce right before serving.
Cultural Background
Maple-flavored pastries are part of North American breakfast traditions, particularly in regions where maple sugaring is part of local agriculture. The maple bar itself is a bakery staple that evolved from classic fried doughnuts and cake dough recipes; this baked version nods to that history while offering a lighter, simpler approach. The use of pure maple syrup connects these bars with seasonal syruping rituals and the broader story of colonial and indigenous exchange of sweeteners in early North American food culture.
Seasonal Adaptations
Autumn is the obvious match: fold in 1 cup of peeled, grated apple or 1/2 cup chopped roasted squash for warming seasonal depth. In winter, add 1/4 teaspoon ground nutmeg and a pinch of cardamom to the batter. For spring and summer, swap half the maple syrup for an equal amount of honey and add lemon zest to the glaze for brightness. These small changes keep the base recipe relevant year-round without sacrificing texture.
Meal Prep Tips
Make a double batch and freeze unglazed slabs for future mornings. Slice only what you need the night before to preserve freshness. For grab-and-go breakfasts, wrap individual bars in parchment and store in a reusable container — they travel well and reheat in a toaster oven for 5–7 minutes at 325°F to bring back that freshly baked warmth.
These soft baked maple donut bars have become a staple in my rotation because they strike the right balance of ease, flavor, and crowd-pleasing appeal. Whether you keep a pan for weekday breakfasts or bring them to a holiday brunch, they’re forgiving to make and generous in flavor — I hope they become one of your go-to morning treats.
Pro Tips
Use pure maple syrup for authentic flavor; imitation syrups lack the caramel and woody notes that elevate the bars.
Do not overmix the batter — fold until just combined to keep the crumb tender and soft.
Cool in the pan for 15 minutes before lifting out to glaze so the slab doesn’t break; move to a wire rack to set the glaze.
This nourishing soft baked maple donut bars recipe is sure to be a staple in your kitchen. Enjoy every moist, high protein slice — it is perfect for breakfast or as a wholesome snack any time.
FAQs about Recipes
Are these bars fried like traditional donuts?
Yes — these are baked, not fried. The texture is soft and cake-like rather than the chewy exterior of a fried donut.
How should I store leftovers?
Store glazed bars at room temperature for up to 48 hours or in the refrigerator for up to 5 days. Freeze unglazed for up to 3 months.
Tags
Soft Baked Maple Donut Bars
This Soft Baked Maple Donut Bars recipe makes perfectly juicy, tender, and flavorful steak every time! Serve with potatoes and a side salad for an unforgettable dinner in under 30 minutes.
Ingredients
For the Batter
For the Glaze
Instructions
Preheat and prep pan
Preheat oven to 350°F. Line a 9x13-inch pan with parchment paper leaving an overhang and lightly grease to ensure easy release.
Combine dry ingredients
Whisk together 2 cups flour, 1 cup sugar, 2 teaspoons baking powder, 1/2 teaspoon salt, and 1 teaspoon cinnamon until evenly mixed.
Whisk wet ingredients
In a separate bowl, beat 2 eggs and add 1/2 cup maple syrup, 1/2 cup milk, and 1/4 cup melted butter; whisk until homogenous.
Mix batter
Pour wet into dry and fold gently until just combined, taking care not to overmix to preserve a tender texture.
Bake
Spread batter into the prepared pan and bake at 350°F for 18–22 minutes until a toothpick shows a few moist crumbs and the top is lightly golden.
Cool and glaze
Cool in pan for 15 minutes, whisk 1 cup powdered sugar with 2 tablespoons milk until smooth, then pour over the warm slab and allow to set.
Slice and serve
Lift slab out using parchment overhang, set on a rack, let glaze set 15–20 minutes, then slice into 12 bars with a serrated knife.
Last Step: Please leave a rating and comment letting us know how you liked this recipe! This helps our business to thrive and continue providing free, high-quality recipes for you.
Nutrition
Did You Make This?
Leave a comment & rating below or tag
@festive-cooks on social media!
Categories:
You might also like...

Air Fryer Parmesan Crusted Chicken
Crispy, golden Parmesan crusted chicken made in the air fryer for a quick family favorite that stays juicy inside and crunchy outside.
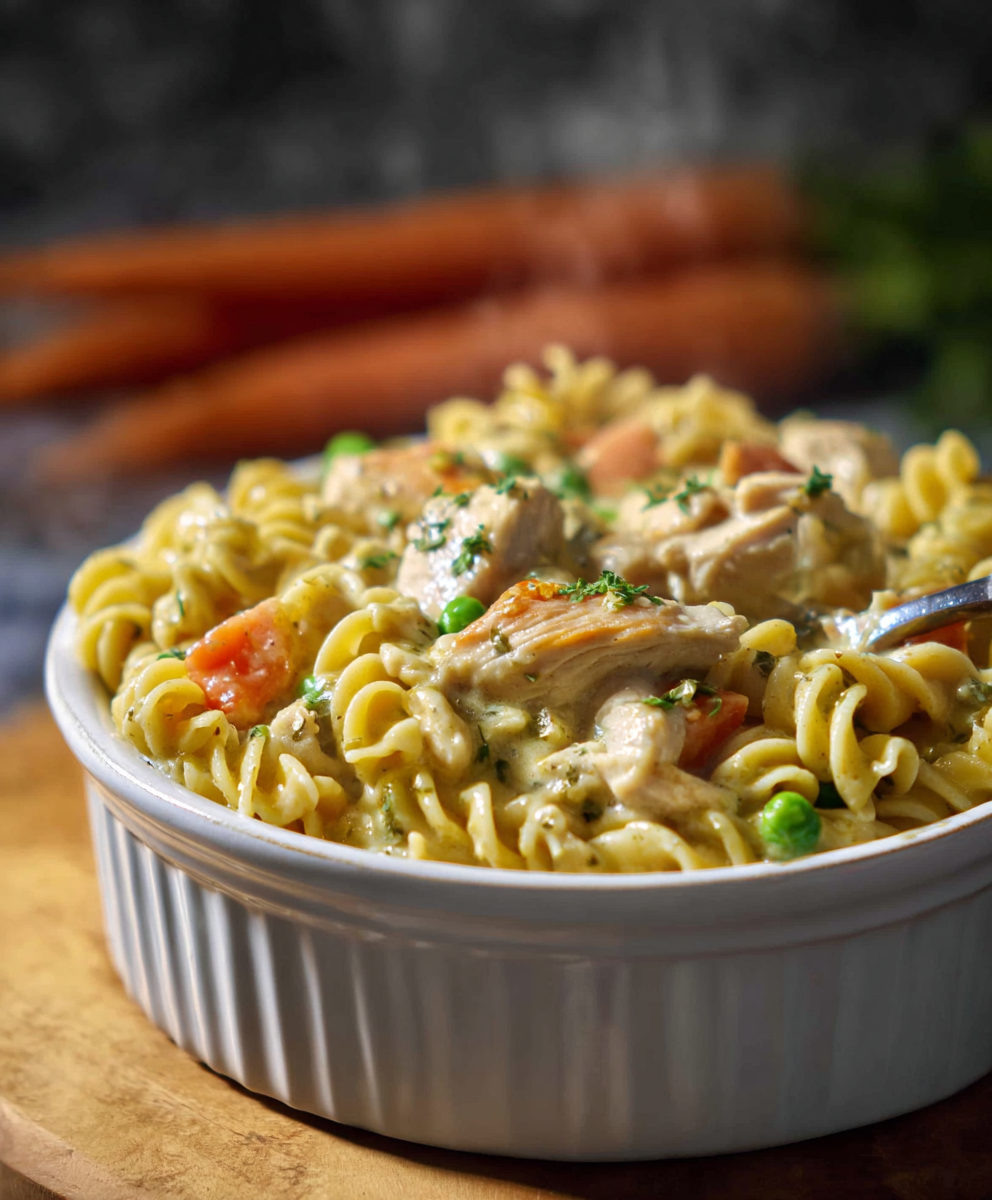
Quick Chicken Pot Pie Pasta
A cozy one-skillet mashup of pot pie comfort and egg noodle ease—ready in about 35 minutes and perfect for weeknight dinners.
Hot Fudge Brownie Bread
A gooey, chocolate-packed loaf with a molten hot-fudge swirl — brownie texture in bread form, perfect warm with a scoop of ice cream.
Did You Make This?
Leave a comment & rating below or tag @festive-cooks on social media!
Rate This Recipe
Share This Recipe
Enjoyed this recipe? Share it with friends and family, and don't forget to leave a review!
Comments (1)
This recipe looks amazing! Can't wait to try it.
Comments are stored locally in your browser. Server comments are displayed alongside your local comments.

Hi, I'm Jessica!
What's Popular
30-Minute Meals!
Join to receive our email series which contains a round-up of some of our quick and easy family favorite recipes.