
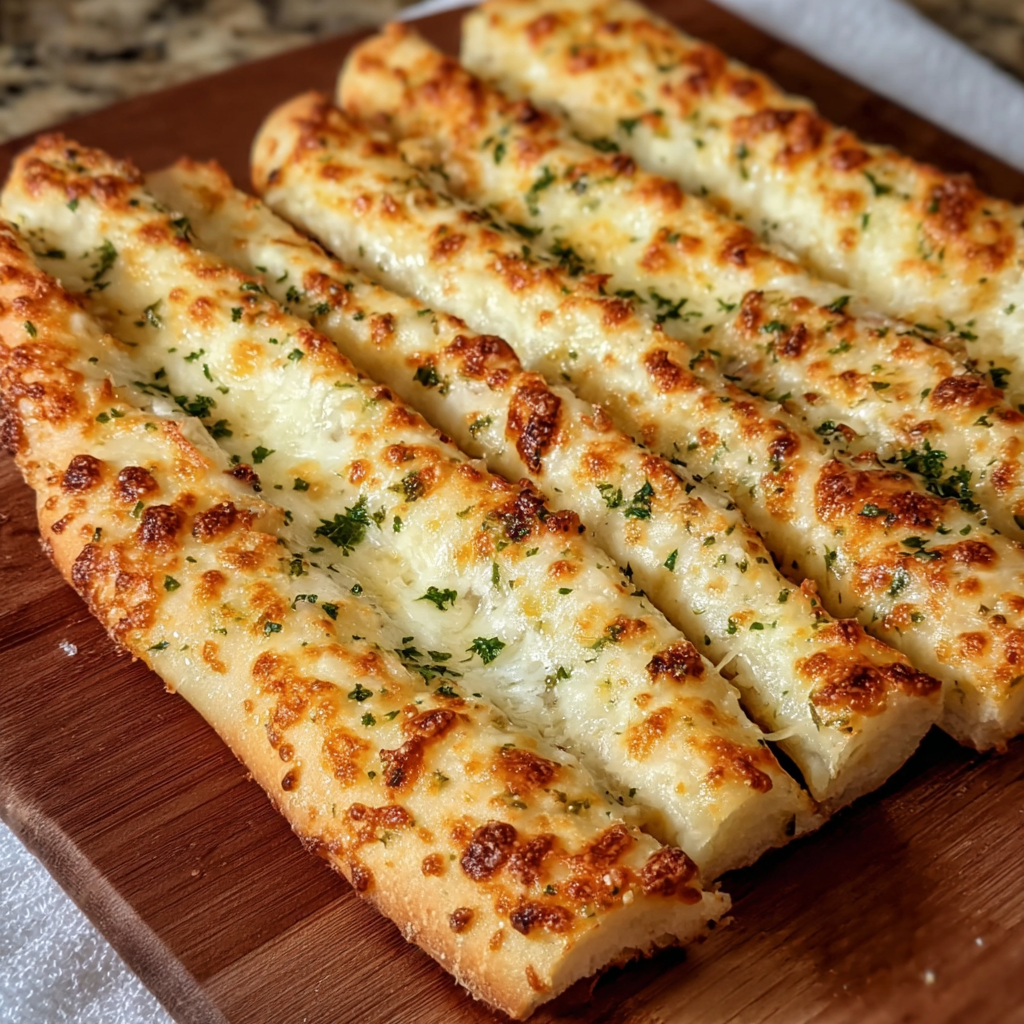
Homemade Cheesy Garlic Breadsticks

Soft, cheesy breadsticks brushed with garlic butter and finished with Parmesan and parsley. A simple, crowd-pleasing side that comes together with pantry staples.
Why You'll Love This Recipe
- Ready with minimal fuss in about one hour and twenty minutes from start to finish. The active work time is short which makes these perfect for busy evenings.
- Uses pantry staples like all purpose flour, active dry yeast, olive oil, and shredded mozzarella. No specialty ingredients required.
- Highly adaptable. Make ahead the dough and refrigerate overnight for fresh breadsticks the next day or freeze baked sticks for up to three months.
- Crowd pleaser. The combination of garlic butter and melted mozzarella appeals to both kids and adults and scales easily for gatherings.
- Textural contrast. You get a soft, pillowy crumb inside and a lightly crisp, golden exterior that holds the toppings without getting soggy.
- Simple technique. The dough is forgiving so beginners can succeed and more experienced cooks can refine shaping and baking to their preference.
I remember serving these at a small winter dinner when a friend declared they were the best bread they had ever had with a bowl of soup. My kids asked for seconds and then thirds. Each time I make them I learn a little more about how long to let the dough relax before rolling and how much garlic butter is enough without overpowering the cheese. Those small discoveries keep me making them again and again.
Ingredients
- Warm water: Use about 1 1/2 cups of water warmed to roughly 110 degrees Fahrenheit. This temperature wakes the yeast without killing it. If you do not have a thermometer aim for pleasantly warm to the touch.
- Active dry yeast: Two teaspoons gives the dough a reliable rise. Look for a recent expiration date and store yeast in the refrigerator after opening for best performance.
- Sugar: One teaspoon helps feed the yeast for a consistent bloom. You can use granulated sugar or a touch of honey if preferred.
- All purpose flour: Four cups creates a slightly chewy structure. Use a spoon and level method when measuring for consistent results. For a lighter crumb, you can substitute part of the flour with bread flour.
- Salt: Two teaspoons seasons the dough. Do not skip it because salt also strengthens gluten which improves texture.
- Olive oil: Four tablespoons adds flavor and tenderness. Use a good extra virgin olive oil for aroma or a light olive oil if you prefer a neutral taste.
- Garlic: Four cloves, minced. Fresh garlic gives the most vibrant flavor. You will mix it with melted butter for brushing.
- Butter: Two tablespoons melted and mixed with garlic to create a glossy finish and rich flavor.
- Mozzarella cheese: Two cups shredded. Whole milk mozzarella melts beautifully. Pre-shredded cheese contains anti caking agents and will still work well.
- Parmesan cheese: One quarter cup grated for finishing. The Parmesan adds a salty nutty contrast to the mozzarella.
- Fresh parsley: Chopped for garnish. Adds color and a hint of freshness when sprinkled just before serving.
Instructions
Activate the yeast In a small bowl combine 1 1/2 cups warm water with 2 teaspoons active dry yeast and 1 teaspoon sugar. Stir gently and let it sit until foamy on top. This should take five to ten minutes. If there is no foam within ten minutes your yeast may be inactive and you should start again with new yeast. Mix the dough In a large bowl whisk together 4 cups all purpose flour and 2 teaspoons salt. Add the yeast mixture and 4 tablespoons olive oil. Stir until a shaggy dough forms. Turn the dough onto a lightly floured surface and knead for about eight to ten minutes until smooth and elastic. Alternatively use a stand mixer with the dough hook for six to eight minutes. First rise Place the dough in a lightly oiled bowl turning once to coat. Cover with a clean towel and let it rise in a warm draft free spot until doubled in size. This will take about one hour but can vary with room temperature. The dough is ready when it springs back slowly when pressed with a fingertip. Prepare the garlic butter Combine 4 cloves minced garlic with 2 tablespoons melted butter. Reserve about one third of the mixture for brushing after baking. The rest will be brushed on before adding the cheese and rolling the dough. Shape and fill Preheat the oven to 425 degrees Fahrenheit. Line a baking sheet with parchment paper. Turn the risen dough onto a lightly floured surface and roll into a roughly 12 by 16 inch rectangle. Brush the surface generously with garlic butter. Sprinkle 2 cups shredded mozzarella evenly across the dough leaving a small border on one edge. Roll and slice Tightly roll the dough from the long side into a log. Use a sharp knife to slice the log into 12 even pieces. Place each piece cut side up on the parchment lined sheet spaced slightly apart. The rolls will spread and become breadstick shaped as they bake. Bake Bake in the preheated oven for 15 to 20 minutes or until golden brown on top and cooked through. Rotate the pan halfway through baking for even color. A thermometer inserted into the center should read about 190 degrees Fahrenheit for fully baked breadsticks. Finish and serve As soon as the breadsticks come out of the oven brush with the reserved garlic butter. Sprinkle 1/4 cup grated Parmesan and chopped fresh parsley over the hot sticks. Let them rest for a few minutes and serve warm for best texture.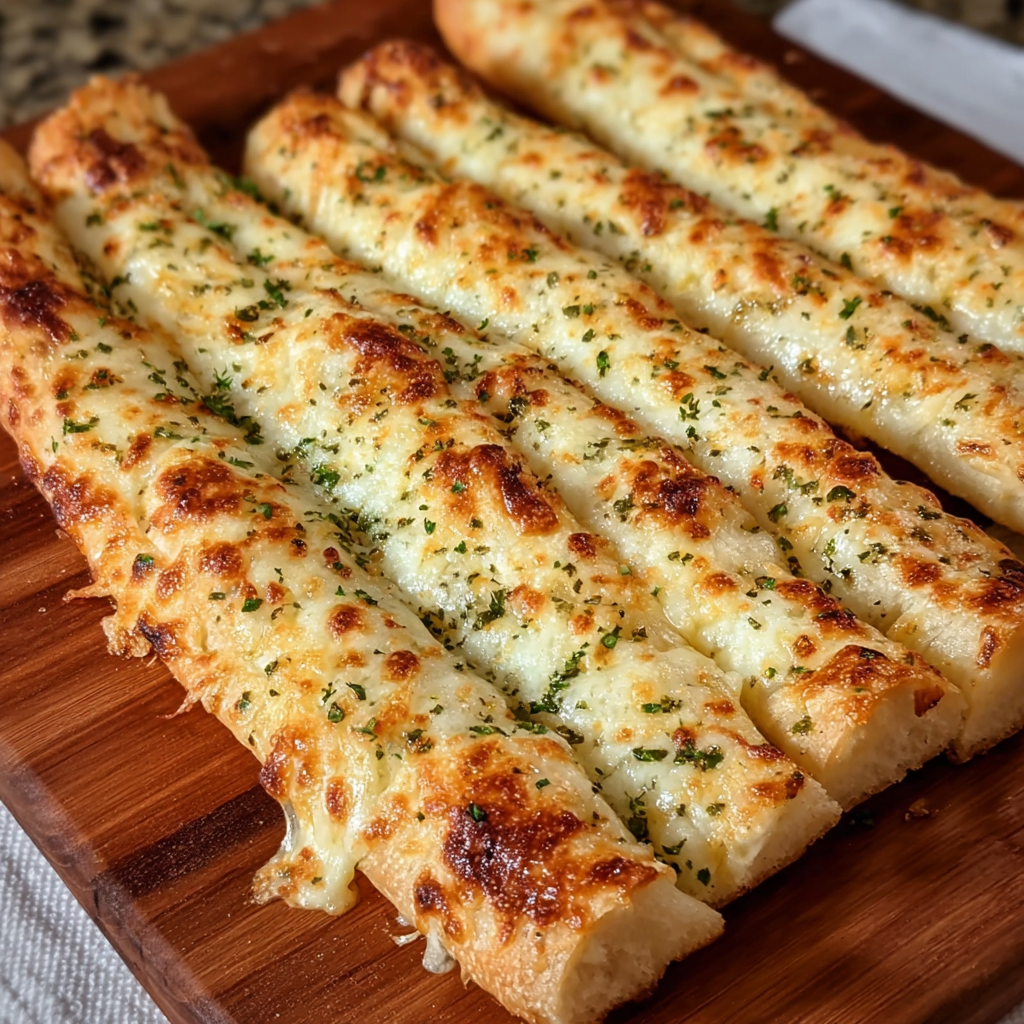
You Must Know
- These breadsticks freeze well for up to three months. Freeze cooled breadsticks in a single layer on a sheet then transfer to a resealable bag.
- They are high in protein when paired with cheese and make a filling side. Each serving will also supply carbohydrates for energy.
- Use warm water around 110 degrees Fahrenheit to activate yeast. Water that is too hot will kill yeast and will prevent rising.
- Allow the dough to double in size for a light interior. If your kitchen is cool place the dough in the oven with only the oven light on to encourage rising.
I love that these breadsticks are forgiving. Over the years I learned to trust visual cues rather than exact timing. The golden color and a gentle spring in the dough are better indicators than the clock. One memorable evening my niece and I made a double batch and handed them out to neighbors who were returning from a long hike. They disappeared within minutes.

Storage Tips
Store cooled breadsticks in an airtight container at room temperature for up to two days. For longer storage keep them refrigerated for up to five days or freeze for up to three months. When reheating frozen sticks place them in a 350 degrees Fahrenheit oven for about ten to twelve minutes until warmed through. If refrigerated microwave in short bursts then crisp in the oven to restore the crust. Glass or BPA free plastic containers both work well for short term storage.
Ingredient Substitutions
If you do not have mozzarella try provolone or a mild cheddar for a different melt quality and flavor. Substitute olive oil with melted butter in the dough for a richer taste. For a lighter option use part whole wheat flour replacing no more than one cup to keep a tender crumb. Garlic powder can replace fresh garlic in a pinch at the rate of 1/2 teaspoon per clove but fresh garlic provides a cleaner aroma and brighter flavor.
Serving Suggestions
Serve these breadsticks with a bowl of warm marinara or herbed olive oil for dipping. Pair them with a crisp green salad and roasted vegetables for a balanced meal. They complement soup especially tomato based soups and creamy chowders. For parties arrange the breadsticks in a basket lined with a cloth napkin and garnish with extra chopped parsley for color. Leftovers also work chopped into a salad as crunchy cheese croutons.
Cultural Background
Cheesy garlic breadsticks are an Americanized take on Italian flavors. They borrow the classic pairing of garlic and olive oil from Italian cuisine and add melted mozzarella for the melting cheese appeal that is beloved in the United States. Variations can be found across pizzerias and home kitchens where the method of rolling and filling has been adapted into knots buns and pull apart loaves. The idea of garlic butter brushed over baked bread is a universal comfort element in many culinary traditions.
Seasonal Adaptations
In summer add chopped sun dried tomatoes and fresh basil for a brighter profile. In winter fold in caramelized onions and a touch of rosemary for a heartier aroma. During holidays incorporate finely chopped roasted garlic and a pinch of smoked paprika to give a festive depth. The dough tolerates mix ins like chopped olives and cooked bacon bits which can transform the breadsticks into themed appetizers.
Meal Prep Tips
Prepare the dough the night before and keep it wrapped in the refrigerator. In the morning allow it to come to room temperature about thirty to forty five minutes then shape and bake. This makes the breadsticks ideal for planning ahead. Portion baked sticks into meal prep containers for lunches. Use parchment paper between layers when freezing to prevent sticking. Label frozen packs with the date and reheat directly from frozen in a covered dish until warmed.
These cheesy garlic breadsticks are simple to love and easy to make. They bring people together and turn ordinary meals into something a little more special. I encourage you to make the dough your own and enjoy the process of sharing warm bread with the people you care about.
Pro Tips
Use warm water around 110°F to activate yeast without killing it.
Brush with reserved garlic butter immediately after baking to let the flavors soak into the crust.
For even baking rotate the pan halfway through the bake time.
Measure flour by spooning into the cup and leveling to avoid a dense dough.
This nourishing homemade cheesy garlic breadsticks recipe is sure to be a staple in your kitchen. Enjoy every moist, high protein slice — it is perfect for breakfast or as a wholesome snack any time.
FAQs about Recipes
What if my yeast does not foam?
If the yeast does not foam within ten minutes the yeast likely is inactive. Use fresh yeast and make sure water is warm but not hot.
How long do breadsticks keep in the freezer?
Wrap cooled breadsticks well and freeze for up to three months. Reheat in a 350°F oven until warmed through.
Tags
Homemade Cheesy Garlic Breadsticks
This Homemade Cheesy Garlic Breadsticks recipe makes perfectly juicy, tender, and flavorful steak every time! Serve with potatoes and a side salad for an unforgettable dinner in under 30 minutes.
Ingredients
Dough
Topping and Finish
Instructions
Activate yeast
Combine warm water with active dry yeast and sugar. Let sit five to ten minutes until foamy to confirm the yeast is active.
Mix dough
Mix flour and salt then add the yeast mixture and olive oil. Knead by hand for eight to ten minutes or with a stand mixer for six to eight minutes until smooth.
First rise
Place the dough in an oiled bowl, cover, and let rise in a warm place until doubled in size about one hour.
Prepare garlic butter
Mix minced garlic with melted butter and reserve a portion for brushing after baking.
Shape and fill
Roll dough into a 12 by 16 inch rectangle, brush with garlic butter, and sprinkle mozzarella evenly.
Roll slice and bake
Roll the dough into a log, slice into 12 pieces, place on a parchment lined sheet, and bake at 425°F for 15 to 20 minutes until golden.
Finish and serve
Brush with reserved garlic butter, sprinkle Parmesan and parsley, and serve warm for best flavor and texture.
Last Step: Please leave a rating and comment letting us know how you liked this recipe! This helps our business to thrive and continue providing free, high-quality recipes for you.
Nutrition
Did You Make This?
Leave a comment & rating below or tag
@festive-cooks on social media!
Categories:
You might also like...

Air Fryer Parmesan Crusted Chicken
Crispy, golden Parmesan crusted chicken made in the air fryer for a quick family favorite that stays juicy inside and crunchy outside.
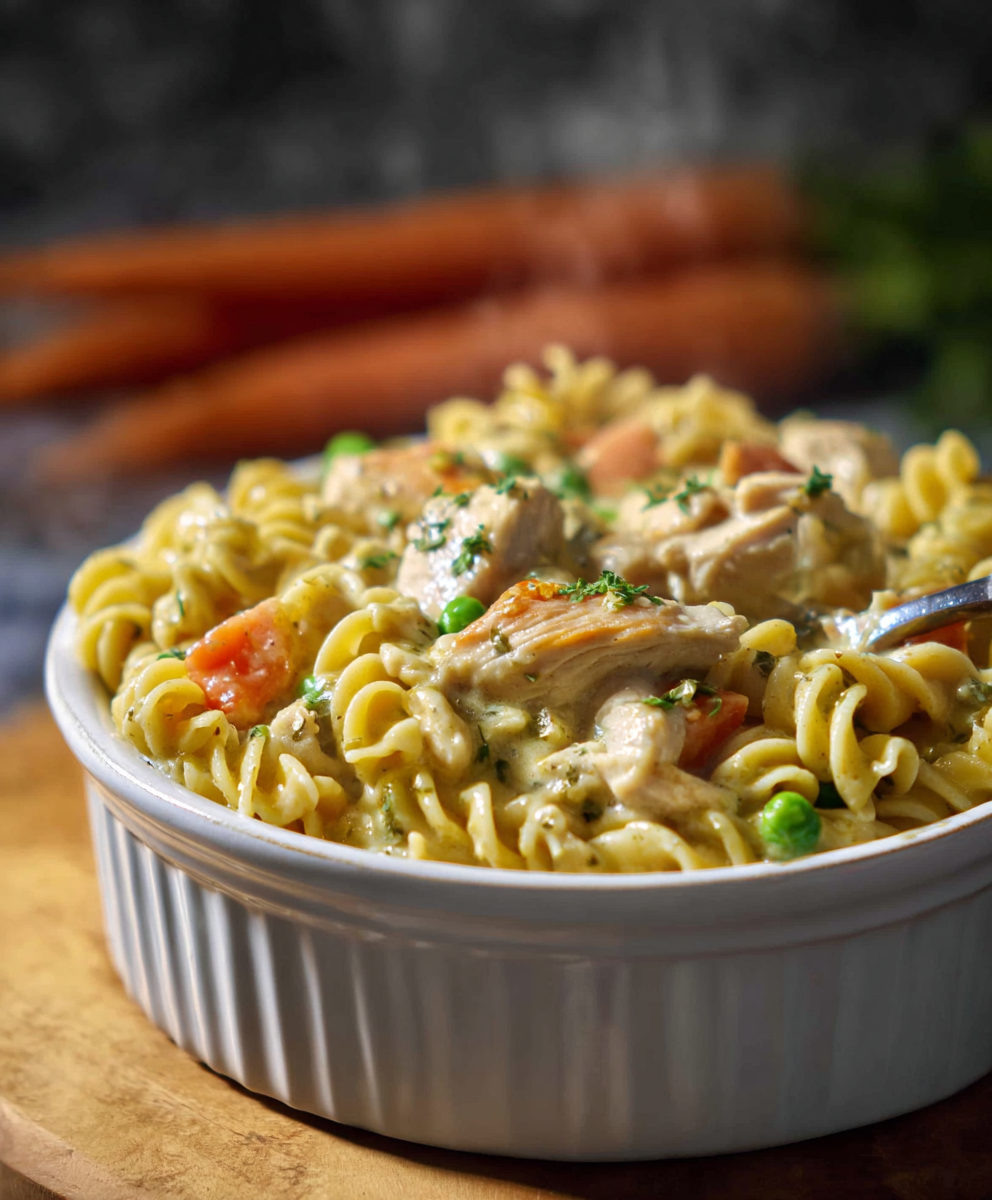
Quick Chicken Pot Pie Pasta
A cozy one-skillet mashup of pot pie comfort and egg noodle ease—ready in about 35 minutes and perfect for weeknight dinners.
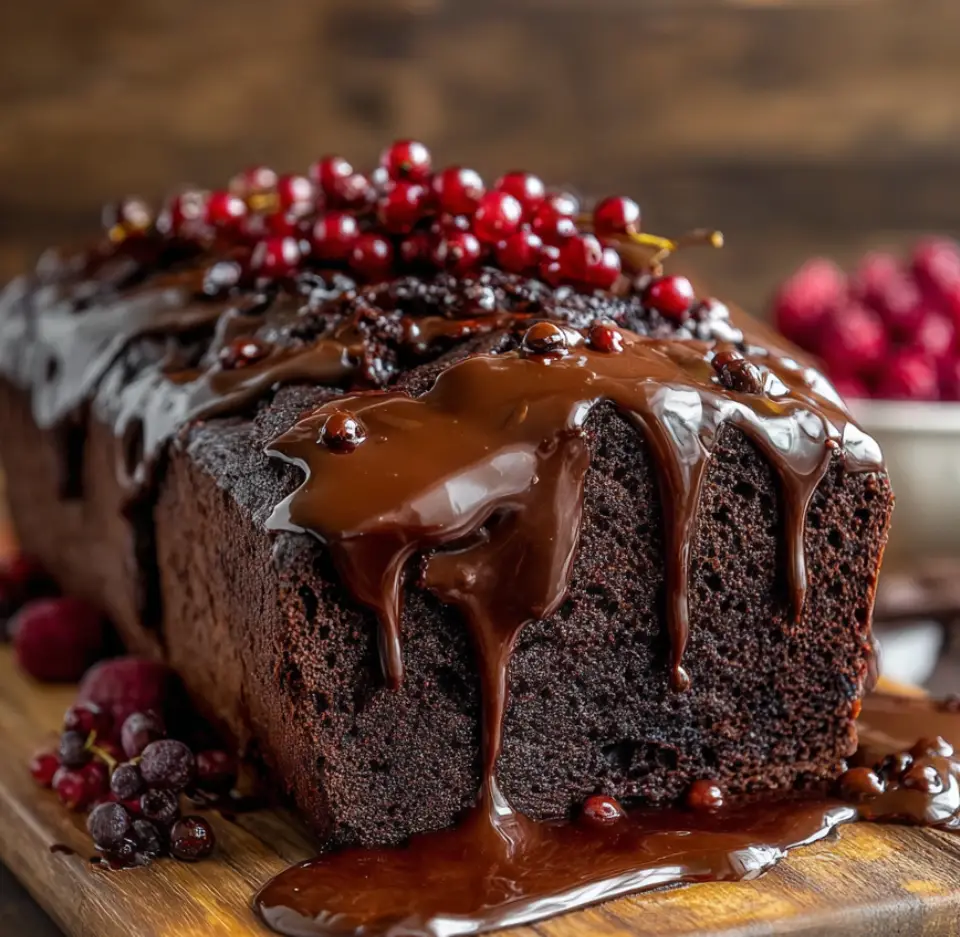
Hot Fudge Brownie Bread
A gooey, chocolate-packed loaf with a molten hot-fudge swirl — brownie texture in bread form, perfect warm with a scoop of ice cream.
Did You Make This?
Leave a comment & rating below or tag @festive-cooks on social media!
Rate This Recipe
Share This Recipe
Enjoyed this recipe? Share it with friends and family, and don't forget to leave a review!
Comments (1)
This recipe looks amazing! Can't wait to try it.
Comments are stored locally in your browser. Server comments are displayed alongside your local comments.

Hi, I'm Jessica!
What's Popular
30-Minute Meals!
Join to receive our email series which contains a round-up of some of our quick and easy family favorite recipes.