>>

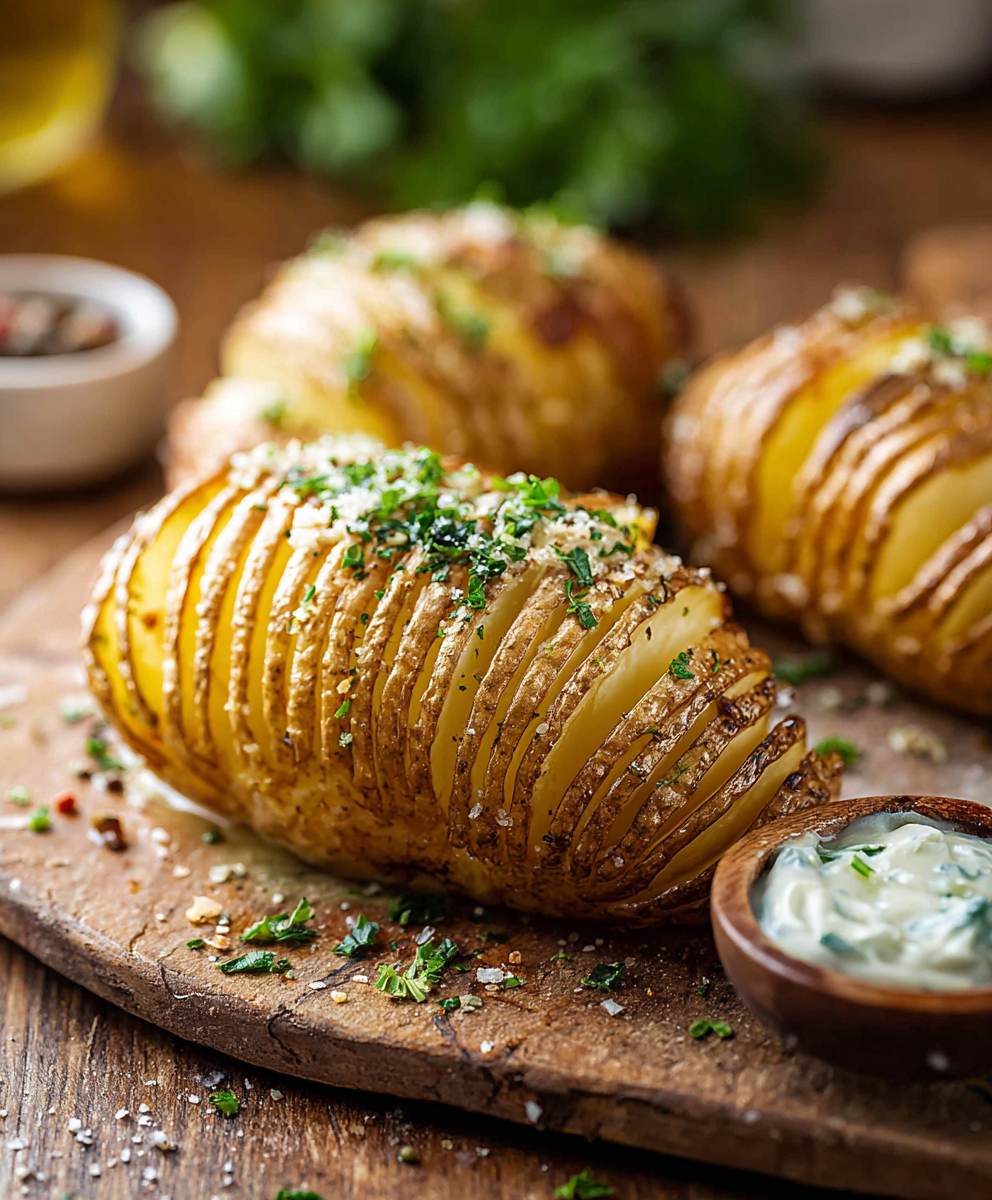
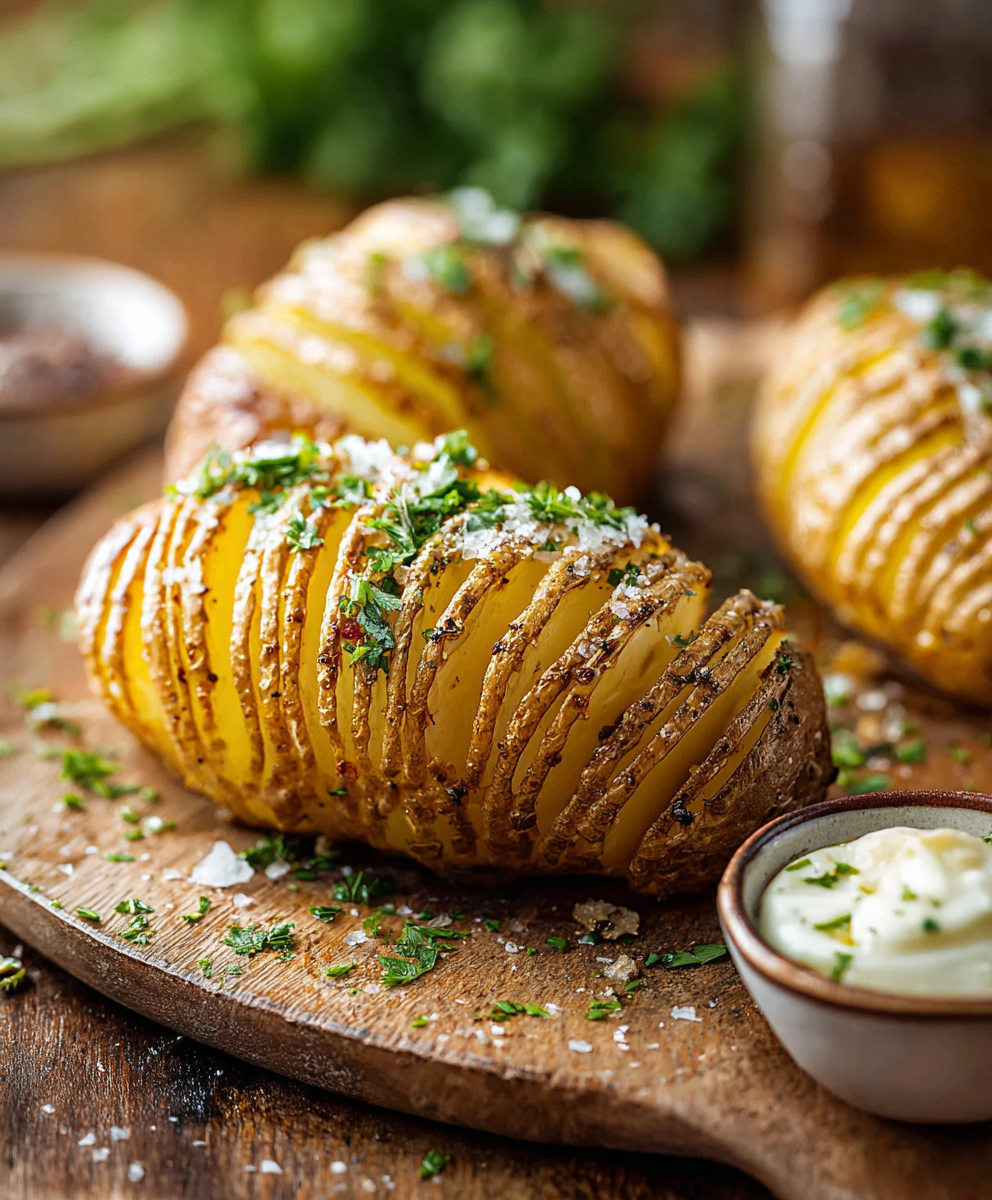
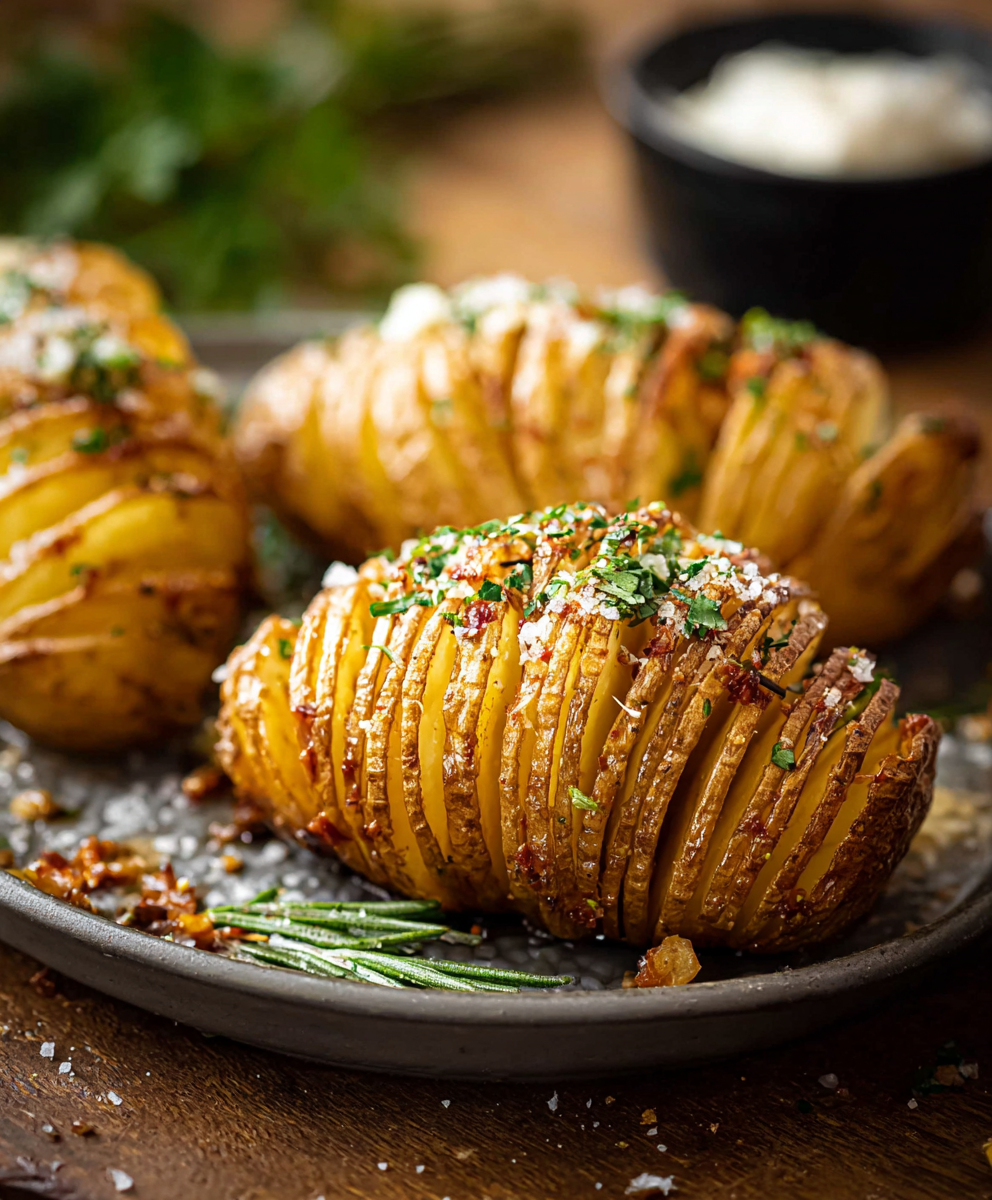
Thinly sliced, buttery russet potatoes roasted until crisp at the edges and tender inside. A simple technique that turns humble spuds into a showstopping side.

This version of Hasselback potatoes has been a quiet star at our family dinners for years. I first learned the slicing technique while staying with a Swedish friend who insisted a simple cut makes all the difference. The memory of the oven opening to a warm wave of buttery aroma and the first knife glide through the crisp outer layers is what keeps me making these whenever guests come over. They are deceptively simple to prepare yet feel celebratory on the plate.
What makes these potatoes special is the contrast of textures and the focused seasoning in each thin fold. The outside crisps to a satisfying golden brown while the interior remains pillowy, and the slits capture melted butter so that every bite is flavored. I often serve them at holiday dinners and casual weeknight meals alike. Even picky eaters are drawn to the crisp edges, and they pair beautifully with roasted meats, grilled fish, or a simple green salad. This is the kind of dish that keeps people talking long after the plates are cleared.
When I first served these at a summer backyard dinner, neighbors asked me for the technique rather than the ingredients. The visual impact of the thin slices and the way the butter pools between them is always a conversation starter. Over time I learned small details, such as using chopsticks as guides and brushing butter twice, that reliably deliver crisp, attractive results.
The element I most enjoy is the ritual of brushing the second round of butter. That moment determines the final texture and shine. Guests often ask how the slices hold so well; the secret is the chopstick guides and a steady knife. If you are short on time, parbake and finish right before serving so the edges stay crisp and the interior stays moist.
Store leftovers in an airtight container in the refrigerator for up to four days. Reheat in a 400°F oven for 10 to 12 minutes to return crispness rather than using a microwave which makes them soft. For longer storage, parbake the potatoes for 20 minutes, cool, wrap individually, and freeze for up to three months. To use frozen portions, thaw overnight in the refrigerator and finish at 425°F until edges crisp and the center is hot.
If you prefer a lower saturated fat option, swap half of the butter for olive oil. Use a high quality extra virgin olive oil for the most flavor. For a dairy free version, replace all butter with olive oil or a plant based spread measured cup for cup. Swap russet potatoes for Yukon gold for a creamier interior; reduce initial bake time by five to ten minutes because Yukon golds cook slightly faster.
Serve these alongside roasted chicken or grilled steak to add a beautiful vegetable component. For a vegetarian plate, pair with sautéed mushrooms, a lemon dressed arugula salad, and a dollop of plain yogurt or sour cream. Garnish with chopped fresh chives, parsley, or a light sprinkle of grated Parmesan. For a festive table, finish with flaky sea salt and a squeeze of lemon to brighten the rich butter.
The technique comes from Sweden and has become popular around the world for its dramatic presentation and simple execution. Traditional preparations are modest, focusing on butter and breadcrumbs, but modern adaptations often add cheese, garlic, or herbs. The method of slicing to increase surface area has parallels in other cuisines where thin cuts encourage crisping and fast, even cooking.
In winter I fold minced rosemary and a touch of thyme into the butter for an earthy profile. In summer switch to lemon zest and fresh dill for brightness or finish with torn basil leaves. Around the holidays add a dusting of smoked paprika and a scattering of toasted breadcrumbs for extra crunch and color.
For make ahead meals, parbake the potatoes until just tender, cool, and store covered in the refrigerator for up to two days. When ready to serve, brush with extra melted butter and finish in a hot oven until the edges crisp. Use shallow, oven safe containers to keep slices intact during transport for potlucks or picnics, and reheat at a higher temperature to refresh the crunch.
These Hasselback potatoes are an easy way to bring theater to the table without fuss. They reward small attentions like a sharp knife and a careful baste, and they always elicit smiles. Try the variations and make one your own for the next gathering.
Use chopsticks or skewers as guides to prevent slicing all the way through.
Brush butter twice: before the first bake and again after 30 minutes for deeper browning.
Dry potatoes thoroughly after washing to encourage better crisping.
Rotate the pan halfway through the final bake if your oven has hot spots.
If using salted butter, reduce added kosher salt by about half a teaspoon.
This nourishing crispy hasselback potatoes recipe is sure to be a staple in your kitchen. Enjoy every moist, high protein slice — it is perfect for breakfast or as a wholesome snack any time.
If you need a dairy free version, replace butter with olive oil or a plant based butter in equal amounts.
Parbake for 20-25 minutes, cool, and freeze for up to three months. Thaw overnight and finish in a hot oven to crisp.
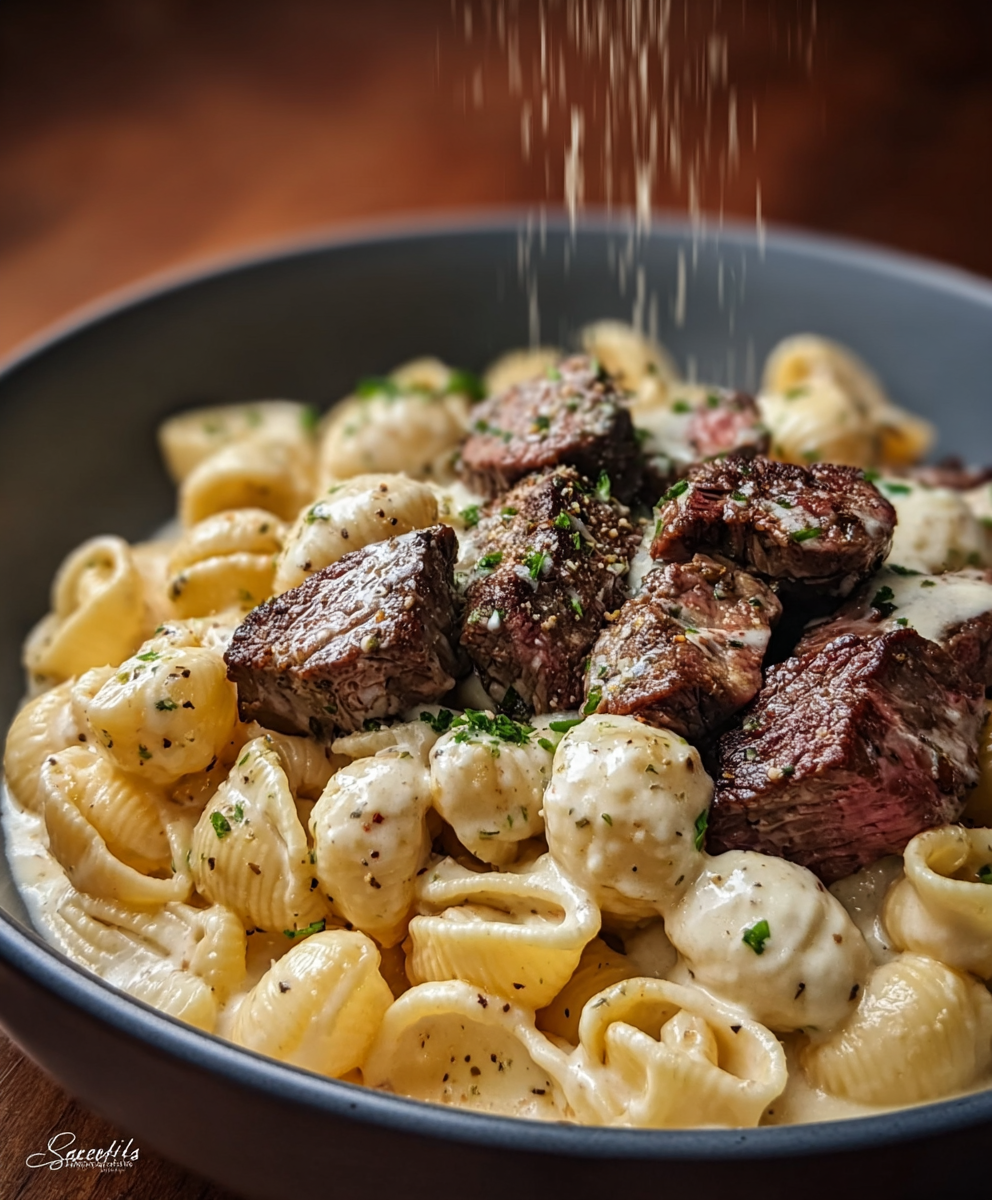
This Crispy Hasselback Potatoes recipe makes perfectly juicy, tender, and flavorful steak every time! Serve with potatoes and a side salad for an unforgettable dinner in under 30 minutes.
Arrange a rack in the middle position of the oven and preheat to 425°F. Use an unlined baking sheet and dry the potatoes thoroughly before slicing.
Place each potato between two chopsticks or skewers to act as depth stops. With a sharp knife slice vertical slits about 1/8 inch apart until the knife meets the guide, keeping the base intact.
Place potatoes on the baking sheet and brush with about half the melted butter, getting some inside the slits. Sprinkle with one teaspoon kosher salt and 1/2 teaspoon black pepper.
Bake for 30 minutes to cook the interior and begin browning the edges. Test with a fork for initial tenderness.
Remove from oven and gently pry slices apart in a few places with the tip of a knife. Brush remaining melted butter into the slits to encourage deeper browning.
Return to the oven and bake an additional 30 to 35 minutes until the edges are crisp and golden and the center is tender. Let rest five minutes and season to taste.
Last Step: Please leave a rating and comment letting us know how you liked this recipe! This helps our business to thrive and continue providing free, high-quality recipes for you.
Leave a comment & rating below or tag
@festive-cooks on social media!

Crispy, golden Parmesan crusted chicken made in the air fryer for a quick family favorite that stays juicy inside and crunchy outside.
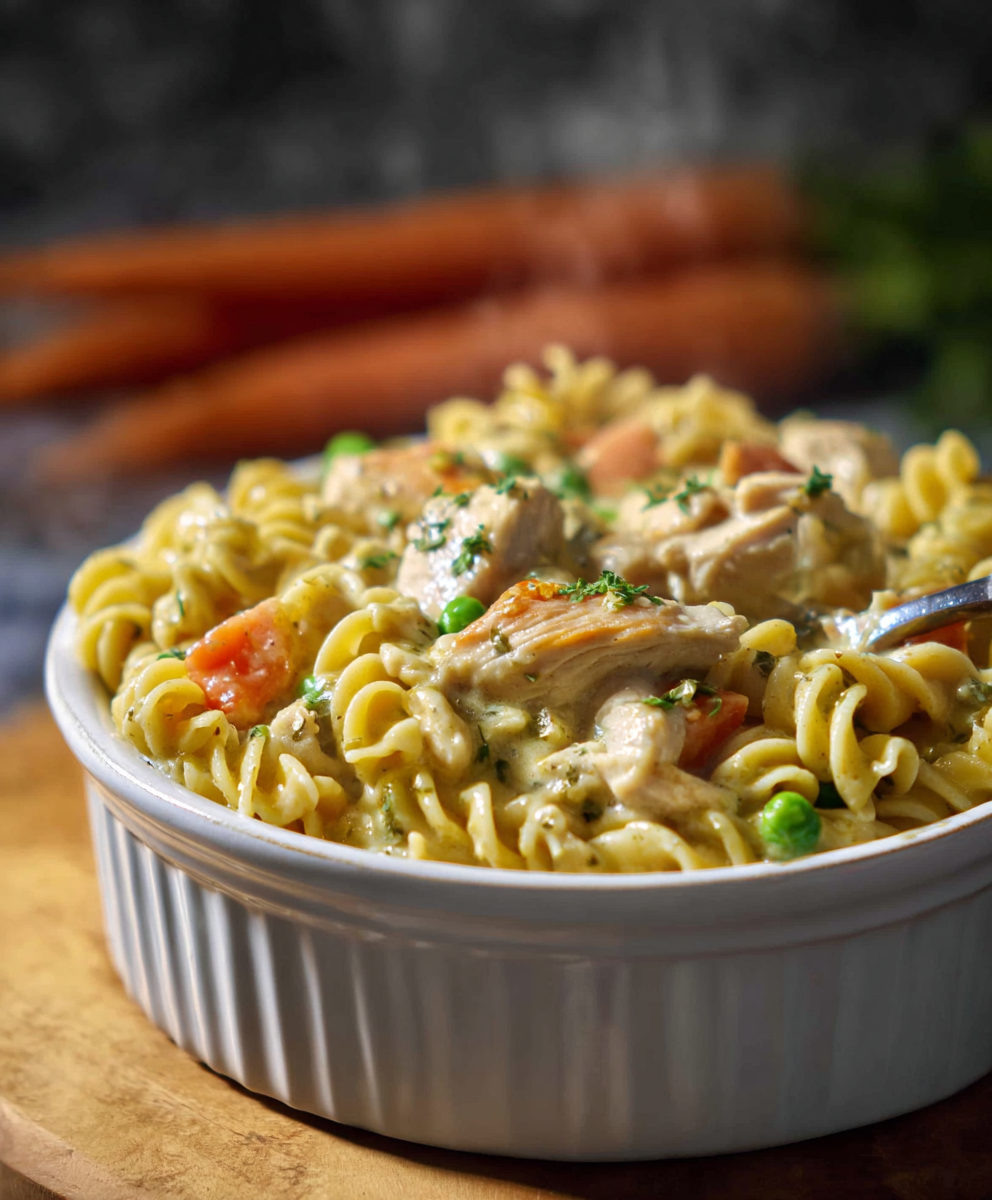
A cozy one-skillet mashup of pot pie comfort and egg noodle ease—ready in about 35 minutes and perfect for weeknight dinners.
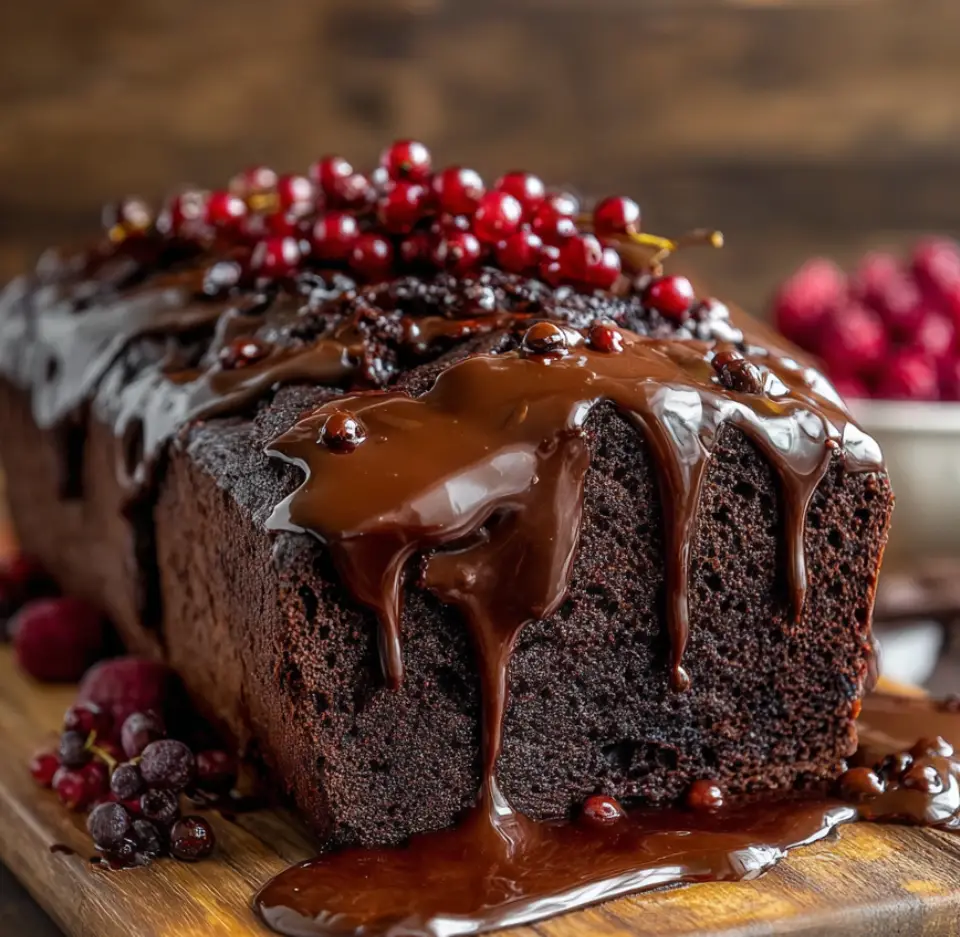
A gooey, chocolate-packed loaf with a molten hot-fudge swirl — brownie texture in bread form, perfect warm with a scoop of ice cream.
Leave a comment & rating below or tag @festive-cooks on social media!
Enjoyed this recipe? Share it with friends and family, and don't forget to leave a review!
This recipe looks amazing! Can't wait to try it.
Comments are stored locally in your browser. Server comments are displayed alongside your local comments.

Join to receive our email series which contains a round-up of some of our quick and easy family favorite recipes.