
Grinch Mini Cheesecakes

Tiny, festive cheesecakes dyed neon green and perched on an Oreo crust — perfect for holiday parties and easy to make ahead.
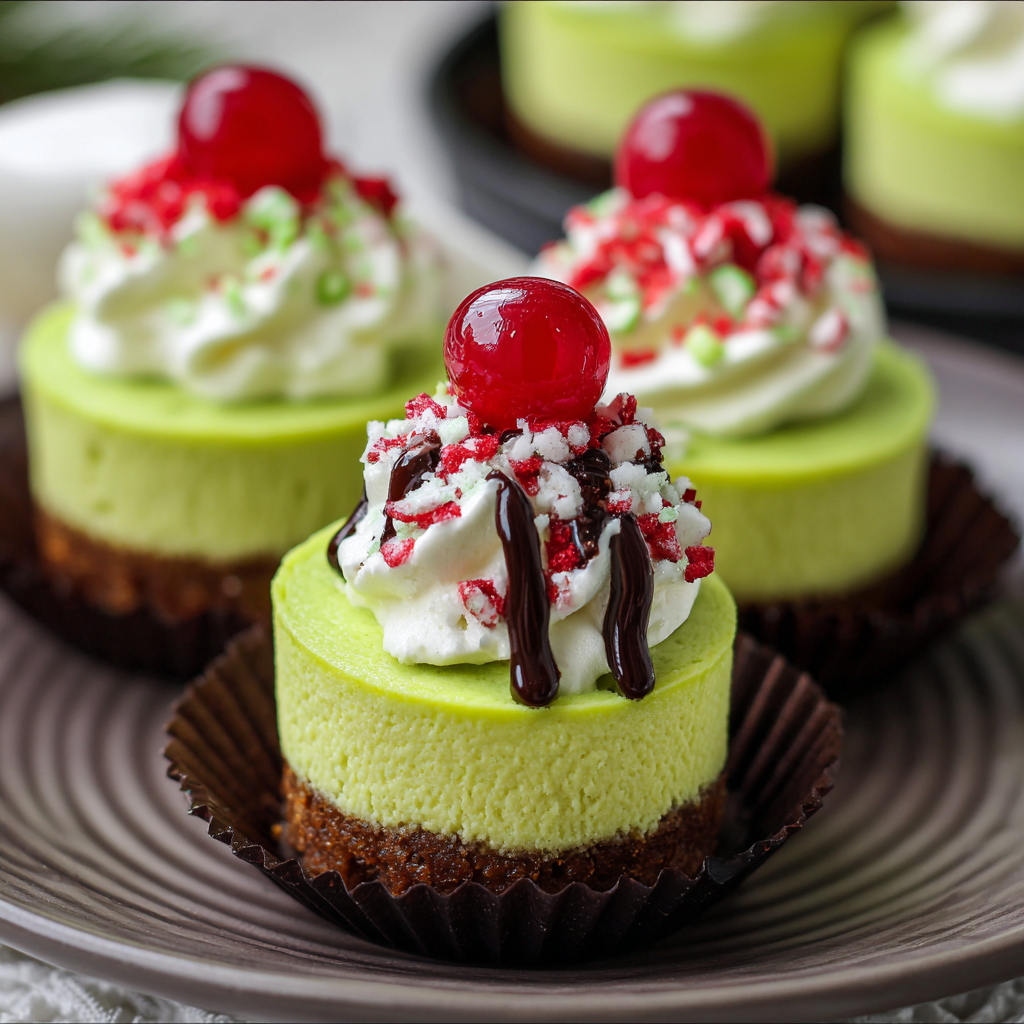
This Grinch mini cheesecakes recipe sprang from a holiday kitchen experiment that turned into an instant tradition. I first made these one December when I wanted something whimsical for a class party but didn't have time for a full-size dessert. The neon green filling tucked into an Oreo crumb base looked delightfully mischievous, and the flavor — rich, creamy, and just sweet enough — made them disappear within minutes. They are small enough to pop in your mouth, but satisfyingly indulgent, which makes them ideal when you want dessert without the ceremony of slicing a whole cake.
What I love most is how forgiving these are. The texture should be smooth and lightly set, with a little jiggle in the center as it comes out of the oven; once chilled, the edges firm up and the center gains that melt-in-your-mouth creaminess. The chocolatey Oreo crust adds a pleasant crunch and contrast to the silky filling. Over the years I've made a few batches for cookie swaps, classroom parties, and cozy family nights — each time someone asks for the recipe. They’re simple, quick, and reliably festive.
Why You'll Love This Recipe
- Ready in about 35 minutes from start to finish (plus chilling): a true quick holiday dessert that uses pantry staples like Oreos, cream cheese, sugar, and eggs.
- Perfect for crowds: makes about 12 bite-sized portions, so guests can sample without a large slice; ideal for parties and potlucks.
- Make-ahead friendly: bake, cool, and chill overnight — finish with whipped cream and sprinkles just before serving.
- Minimal equipment required: a food processor or sturdy zip-top bag for crushing cookies and a hand mixer or stand mixer for smoothing the filling.
- Highly customizable: swap the crust or adjust the color and toppings to suit other themes or dietary needs.
- Kid-approved presentation: the bright Grinch green always gets giggles and makes dessert feel playful and festive.
In my house these became a Christmas morning favorite the year my niece insisted on making “Grinch food.” She helped press the crust and sprinkle the toppings; seeing her delight made the simple effort feel like a warm family memory. The recipe lives on for both its convenience and the little moments it fosters.
Ingredients
- Oreos (for crust): Use classic sandwich cookies for the best chocolate flavor; about 10–11 cookies yields roughly 1 cup of crumbs. If you prefer a less sweet base, try a chocolate wafer or graham crumble.
- Butter: 2 1/2 tablespoons, melted. Unsalted is preferred so you can control seasoning; melted butter binds the crumbs and crisps when baked.
- Cream cheese: 2 (8 oz) packages, softened to room temperature. Full-fat cream cheese gives the silkiest texture — I recommend Philadelphia or a trusted store brand for consistent results.
- Sugar: 1/2 cup granulated sugar. It sweetens without overpowering and helps the filling achieve a creamy, tender set.
- Eggs: 2 large eggs at room temperature. Eggs provide structure and a smooth mouthfeel; bringing them to room temperature prevents curdling.
- Vanilla extract: 1 teaspoon for depth and balance; pure vanilla offers a cleaner flavor than imitation.
- Neon green food coloring: Add a few drops at a time until you reach the iconic Grinch hue. Gel colors give vivid results without watering down the batter.
- Topping options (optional): Whipped cream, festive sprinkles, or a little red candy to mimic the Grinch’s heart — optional but fun.

Instructions
Preheat and prepare: Preheat the oven to 350 degrees Fahrenheit. Line a 12-cup muffin pan with paper liners so the cheesecakes are easy to remove. Room-temperature ingredients make mixing smoother and reduce the risk of a grainy filling. Create the crust: Pulse about 10–11 Oreo cookies in a food processor until they form fine crumbs — you should end up with roughly 1 cup. If you don’t have a processor, place cookies in a heavy-duty zip-top bag and crush with a rolling pin. Stir in 2 1/2 tablespoons melted butter until the crumbs hold together when pressed. Divide evenly among the 12 liners and press firmly into the bottom using a spoon or the bottom of a small glass to create a compact base. Make the filling: In a medium bowl, beat the softened cream cheese and 1/2 cup sugar on medium speed until smooth and free of lumps — about 2 minutes. Beat in the eggs one at a time, blending just until incorporated to avoid overmixing. Add 1 teaspoon vanilla and then stir in neon green food coloring a few drops at a time until you reach your desired shade; gel coloring will create a vibrant green with minimal liquid. Assemble the minis: Spoon about 1/4 cup of the green filling into each crust-lined cup, filling them evenly. Gently tap the pan on the counter to remove any air bubbles and level the surface. The cups should be mostly full but leave a small margin for the filling to set without overflowing. Bake and chill: Bake at 350 degrees Fahrenheit for 15–17 minutes. The centers should still be slightly jiggly — they will firm as they cool. Allow the cheesecakes to cool completely in the pan on a wire rack, then refrigerate for at least 2–3 hours or overnight for best texture. Decorate and serve: Top each mini with a dollop of whipped cream and festive sprinkles just before serving. For a playful touch, add a tiny red candy or red sanding sugar to mimic the Grinch’s little heart. These are best served chilled but can sit at room temperature for up to 30 minutes during a party.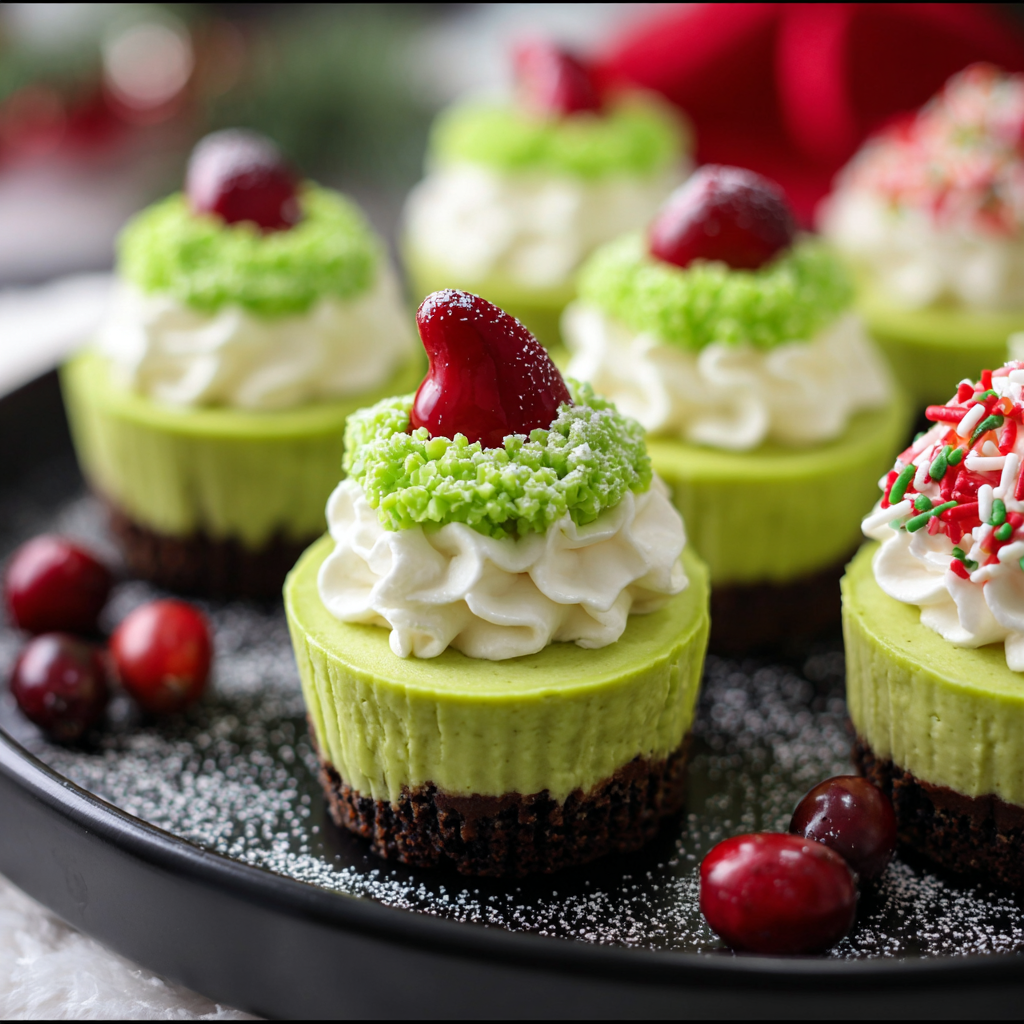
You Must Know
- These mini cheesecakes freeze well for up to 3 months if you skip the whipped cream topping; thaw in the refrigerator before serving.
- They are relatively high in dairy and contain gluten from the Oreo crust, so they are not suitable for those with those specific allergies unless modified.
- For the best texture, avoid overbaking — a slight jiggle in the center is the key visual cue that they’re done.
- Use gel food coloring for bright green without altering the batter consistency; liquid colorings can make the filling runny if overused.
My favorite thing about this treat is how instantly festive it feels. One batch can enliven a cookie tray or give a single-serving dessert station a playful centerpiece. Family and friends always smile at the vibrant color, and it’s a reliable way to get kids involved in decorating. The combination of crunchy chocolate crust and creamy, tangy filling keeps people coming back for more.
Storage Tips
Store leftovers in an airtight container in the refrigerator for up to 4 days. If stacking, separate layers with parchment paper to protect the topping. For longer storage, freeze un-topped minis on a baking sheet until firm, then transfer to a freezer-safe container for up to 3 months. Thaw overnight in the refrigerator and add whipped cream or sprinkles just before serving. When reheating slightly for a softer mouthfeel, let sit at room temperature for 10–15 minutes; do not microwave as it will alter the texture.
Ingredient Substitutions
For a gluten-free version, substitute gluten-free chocolate sandwich cookies for the crust or use almond flour mixed with cocoa and butter. To lighten the filling, you can use a blend of reduced-fat cream cheese and full-fat Greek yogurt, though expect a slightly tangier and less dense result. For a dairy-free and vegan alternative, try a firm cashew-based filling set with agar and use dairy-free cream cheese replacements, but texture and flavor will differ from the original.
Serving Suggestions
These minis pair beautifully with a small cup of espresso or a citrusy tea to cut through the richness. Arrange them on a festive platter with contrasting red candies or powdered sugar dusting for a holiday display. For an elegant twist, serve with a tiny spoonful of raspberry compote or a dot of lemon curd to add brightness. They’re also great as part of a dessert buffet or boxed up individually for party favors.
Cultural Background
Mini cheesecakes are a modern spin on the classic cheesecake, which has roots in ancient Greece but evolved through Roman and European baking traditions into the creamy American-style versions we know today. The playful Grinch theme takes inspiration from Dr. Seuss’s holiday character, mixing cultural nostalgia with contemporary party trends that favor bite-sized, shareable desserts. These small-format treats reflect today’s appetite for portable, photogenic desserts at gatherings.
Seasonal Adaptations
While these are perfect for winter and Christmas, adapt them for other holidays by changing the color and toppings: pastel greens for spring, spooky neon greens with edible eyes for Halloween, or ombre shades for summer parties. Swap sprinkles seasonally — use edible gold stars for New Year’s or heart-shaped candies for Valentine’s Day. The base technique remains the same, making it easy to tailor the flavor and look for any occasion.
Meal Prep Tips
To streamline for a party, prepare the crusts and filling a day ahead. Bake in the morning, cool, and refrigerate; finish with toppings just before guests arrive. Portion into disposable mini tart boxes for easy transport. If making several batches, label containers with baking dates and keep chilled during transit in a cooler with ice packs to maintain texture and safety.
These Grinch mini cheesecakes are small in size but big on personality — a cheerful centerpiece for celebrations and a dependable, easy dessert to make your holidays sparkle. Try them once and they’ll become your go-to when you want something festive and fuss-free.
Pro Tips
Bring cream cheese and eggs to room temperature to ensure a smooth, lump-free filling.
Use gel food coloring for vibrant green without adding excess liquid.
Avoid overbeating once eggs are added to prevent incorporating too much air, which can cause cracks.
Chill for several hours or overnight to let flavors meld and texture set properly.
This nourishing grinch mini cheesecakes recipe is sure to be a staple in your kitchen. Enjoy every moist, high protein slice — it is perfect for breakfast or as a wholesome snack any time.
FAQs about Recipes
Can I make these ahead of time?
Yes — bake and cool them, then refrigerate for at least 2–3 hours or overnight; decorate just before serving.
How long do they keep in the freezer?
Freeze un-topped minis on a tray, then transfer to a freezer-safe container for up to 3 months; thaw in the refrigerator.
Tags
Grinch Mini Cheesecakes
This Grinch Mini Cheesecakes recipe makes perfectly juicy, tender, and flavorful steak every time! Serve with potatoes and a side salad for an unforgettable dinner in under 30 minutes.
Ingredients
Crust
Filling
Toppings (optional)
Instructions
Preheat and Prepare
Preheat oven to 350°F and line a 12-cup muffin pan with liners. Ensure cream cheese and eggs are at room temperature for smoother mixing.
Make the Crust
Pulse about 10–11 Oreos in a food processor until fine crumbs form, then mix in 2 1/2 tablespoons melted butter until the mixture holds together when pressed. Divide evenly among 12 liners and press firmly to form compact bases.
Mix the Filling
Beat softened cream cheese with 1/2 cup sugar until smooth. Add eggs one at a time, then vanilla. Stir in neon green food coloring until the desired intensity is achieved, using gel color for the best vibrancy.
Assemble
Spoon about 1/4 cup of filling into each crust-lined cup, filling evenly. Tap the pan to remove air bubbles and level the tops gently.
Bake and Chill
Bake at 350°F for 15–17 minutes until centers are slightly jiggly. Cool completely on a wire rack, then refrigerate for at least 2–3 hours or overnight before serving.
Decorate and Serve
Top chilled minis with whipped cream and sprinkles or a tiny red candy just before serving. Store leftovers in an airtight container in the refrigerator for up to 4 days.
Last Step: Please leave a rating and comment letting us know how you liked this recipe! This helps our business to thrive and continue providing free, high-quality recipes for you.
Nutrition
Did You Make This?
Leave a comment & rating below or tag
@festive-cooks on social media!
Categories:
You might also like...

Air Fryer Parmesan Crusted Chicken
Crispy, golden Parmesan crusted chicken made in the air fryer for a quick family favorite that stays juicy inside and crunchy outside.

Quick Chicken Pot Pie Pasta
A cozy one-skillet mashup of pot pie comfort and egg noodle ease—ready in about 35 minutes and perfect for weeknight dinners.
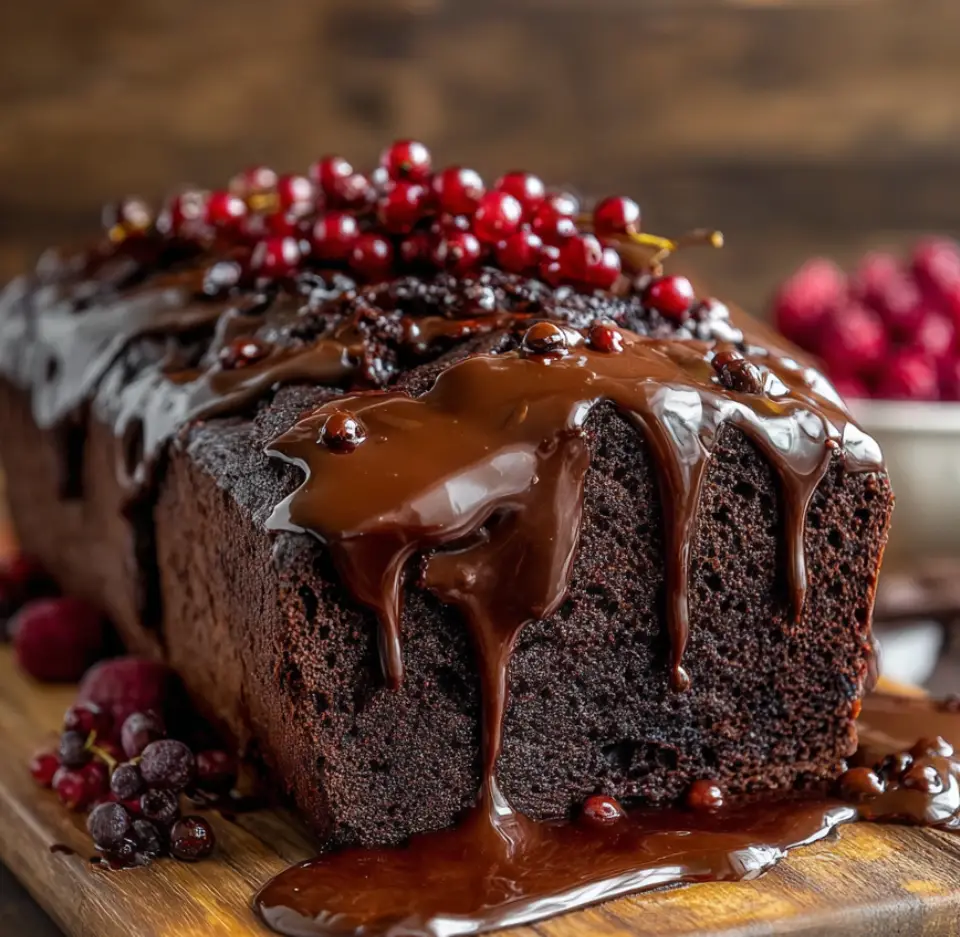
Hot Fudge Brownie Bread
A gooey, chocolate-packed loaf with a molten hot-fudge swirl — brownie texture in bread form, perfect warm with a scoop of ice cream.
Did You Make This?
Leave a comment & rating below or tag @festive-cooks on social media!
Rate This Recipe
Share This Recipe
Enjoyed this recipe? Share it with friends and family, and don't forget to leave a review!
Comments (1)
This recipe looks amazing! Can't wait to try it.
Comments are stored locally in your browser. Server comments are displayed alongside your local comments.

Hi, I'm Jessica!
What's Popular
30-Minute Meals!
Join to receive our email series which contains a round-up of some of our quick and easy family favorite recipes.