>>

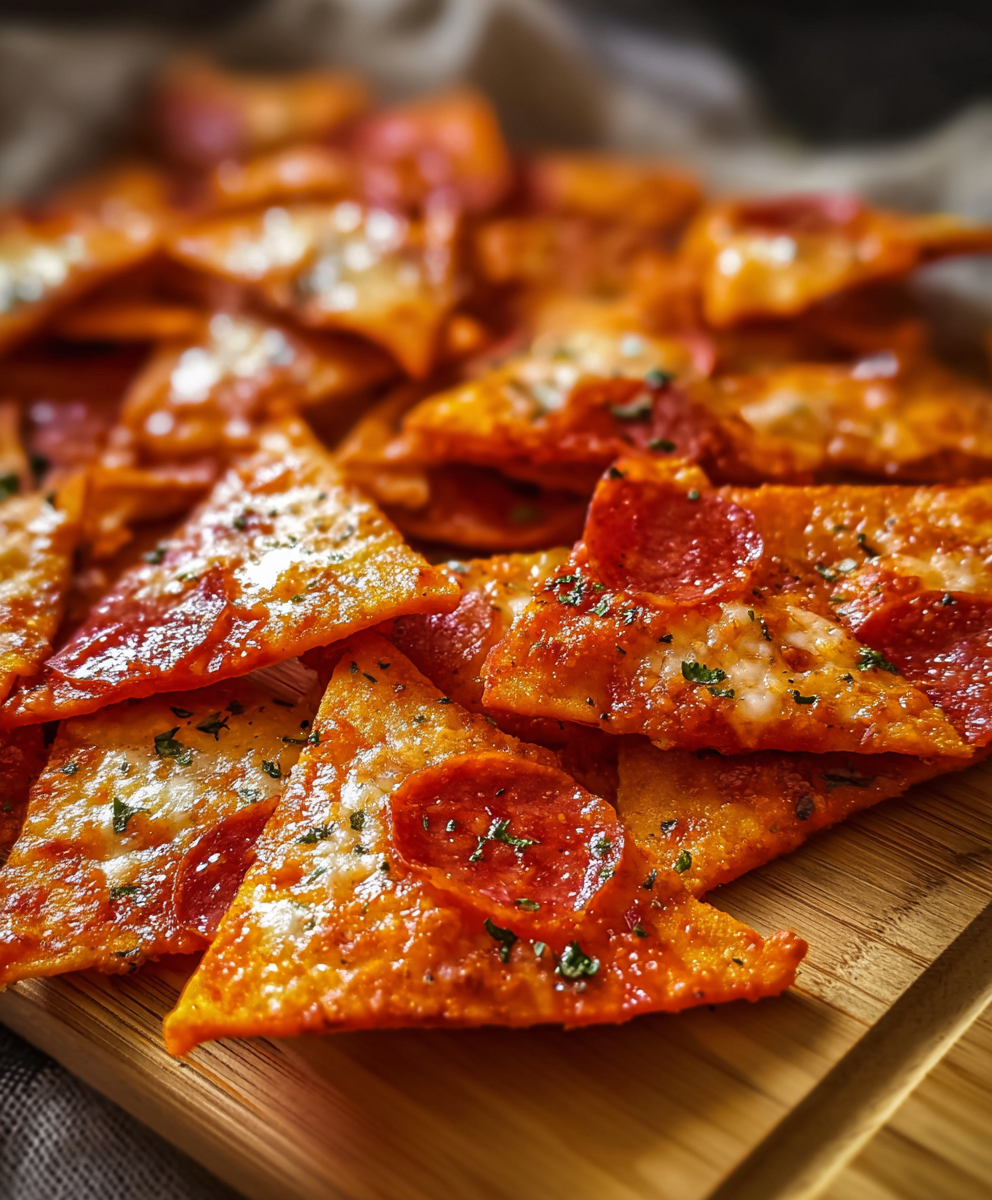
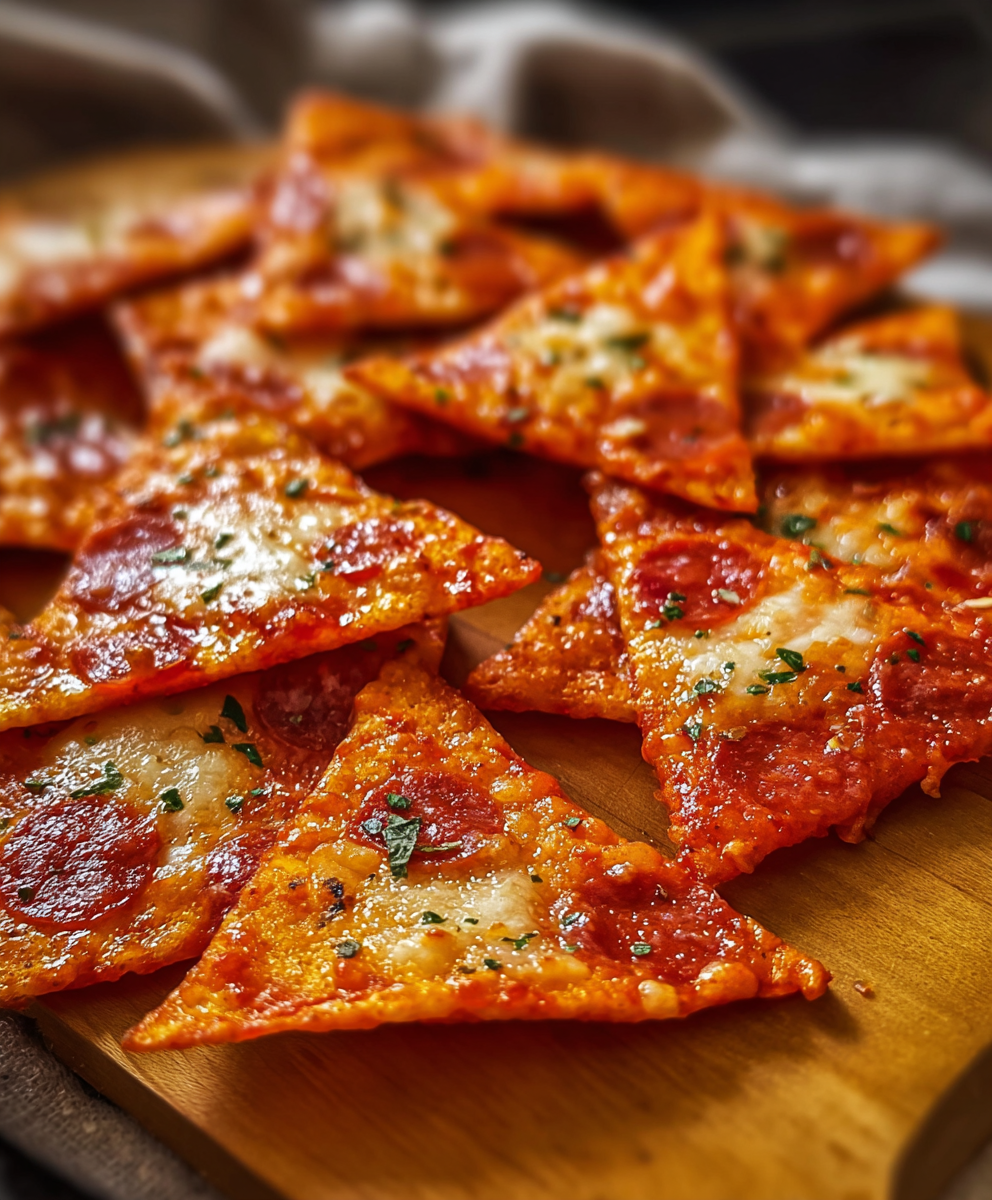
Turn simple tortillas into irresistible, oven-baked pizza chips topped with melty cheese and your favorite pizza toppings—ready in under 25 minutes.

This snack-sized twist on pizza is one of those discoveries that feels like an oven-friendly miracle. I first made these when friends dropped by unexpectedly and the usual chips-and-dip lineup felt too ordinary. Using tortillas as a crisp, sturdy base and layering on a concentrated spoonful of pizza sauce, a blanket of mozzarella, and bright, pick-your-favorite toppings turned out to be the fastest way to deliver that classic pizza satisfaction in a crunchy, handheld format. The result is a snack that bridges casual gatherings and weeknight cravings without fuss.
What I love most about these is how forgiving they are. Whether you choose corn tortillas for a rustic, extra-crisp outcome or flour tortillas for a slightly softer, pliable bite, the technique stays the same and the payoff is reliably delicious. The aroma that fills the kitchen while the cheese melts and edges turn golden always gets a few of us hovering by the oven. These chips are dangerously shareable, perfect for movie nights, game day, or an easy appetizer when time is short.
In my gatherings these chips disappear first—kids reach for the ones with pepperoni while adults gravitate to versions with roasted peppers and a dusting of Parmesan. I’ve also discovered that a short cool-down on a wire rack preserves the crunch even longer, which is handy when prepping ahead for a party.
My favorite aspect is how adaptable the technique is. At a recent potluck I brought a batch with classic pepperoni and another with roasted peppers and no one guessed how effortless they were to make—people kept coming back for more. I’ve learned that a light hand with sauce and even distribution of cheese are the little decisions that make a big difference in texture and appearance.
For short-term storage, let chips cool completely then place them in a single layer inside an airtight container with a sheet of parchment between layers to prevent sticking. At room temperature they remain reasonably crisp up to 24 hours; refrigeration can introduce humidity and soften them, so avoid the fridge unless you plan to re-crisp in a 350°F oven for 5 minutes. For make-ahead parties, par-bake the wedges and store raw cut wedges in a sealed bag in the fridge for up to 2 days—assemble and bake just before serving. Freezing fully baked chips is possible but may affect crunch; if you must freeze, flash-freeze in a single layer then transfer to a freezer bag and reheat in an oven to restore texture.
If you need a gluten-free option, choose certified corn tortillas and double-check toppings and seasonings for hidden gluten. For dairy-free needs, swap shredded dairy-free mozzarella alternatives and finish with a sprinkle of nutritional yeast for umami. To reduce sodium, use a low-sodium pizza sauce or make a quick tomato topping by simmering canned tomatoes with garlic and dried herbs. For extra protein, add a small amount of cooked chicken or Italian sausage; keep meats finely diced so they heat through quickly without releasing excess moisture that would compromise crispness.
Serve on a large platter with small ramekins of extra pizza sauce for dipping, or arrange alongside a fresh green salad to balance the fries-like crunch. Garnish with torn fresh basil or a drizzle of good olive oil for a restaurant-worthy finish. These chips pair well with sparkling sodas, light beers, or a chilled glass of rosé for casual entertaining. For kid-friendly presentations, make variety trays with certain chips labeled "mild" and others "spicy" so everyone can choose their preference.
This snack blends Italian-American flavors with a hands-on, American-style finger food tradition. Turning pizza elements into snackable pieces has roots in leftovers reinvention and tapas-style service—the idea of concentrating flavors into small bites is common across many cuisines. The chips emphasize contrast between a crunchy base and melty cheese, a texture play that’s always been central to casual Italian-American sharing dishes like bruschetta or focaccia slices topped and served communal-style.
In summer use fresh tomatoes reduced into a quick concentrated sauce and top with fresh basil and sweet corn for a seasonal twist. In autumn and winter, roasted root vegetables, caramelized onions, and sage make comforting toppings; swap mozzarella for a blend with aged provolone for deeper flavor. For holiday gatherings, set up a DIY station where guests assemble their own chips with prepped toppings so the oven becomes a live-action part of the celebration.
To streamline for busy weeks, par-bake a dozen stacks of tortilla wedges and store them in a sealed container in the fridge; when hunger hits, top and bake for just a few minutes. Pre-shred cheese and portion toppings into labeled containers for quick assembly. If making multiple batches, rotate baking sheets—transfer finished chips to a wire rack and use the hot sheet again so baking stays efficient. These little steps save time and make hosting or weeknight snacking effortless.
These chips capture the best of pizza and crunchy snacks in one simple method—share them, tweak them, and make them your own. I hope this inspires a new favorite for your next get-together or cozy night in.
Par-bake tortilla wedges for 5–7 minutes before adding sauce to prevent sogginess.
Use thicker pizza sauce or simmer jarred sauce briefly to concentrate it and reduce moisture.
Arrange wedges with space between them so hot air can circulate and edges crisp evenly.
Cool chips briefly on a wire rack to keep all surfaces crisp rather than trapping steam on a tray.
This nourishing crispy pizza chips recipe is sure to be a staple in your kitchen. Enjoy every moist, high protein slice — it is perfect for breakfast or as a wholesome snack any time.
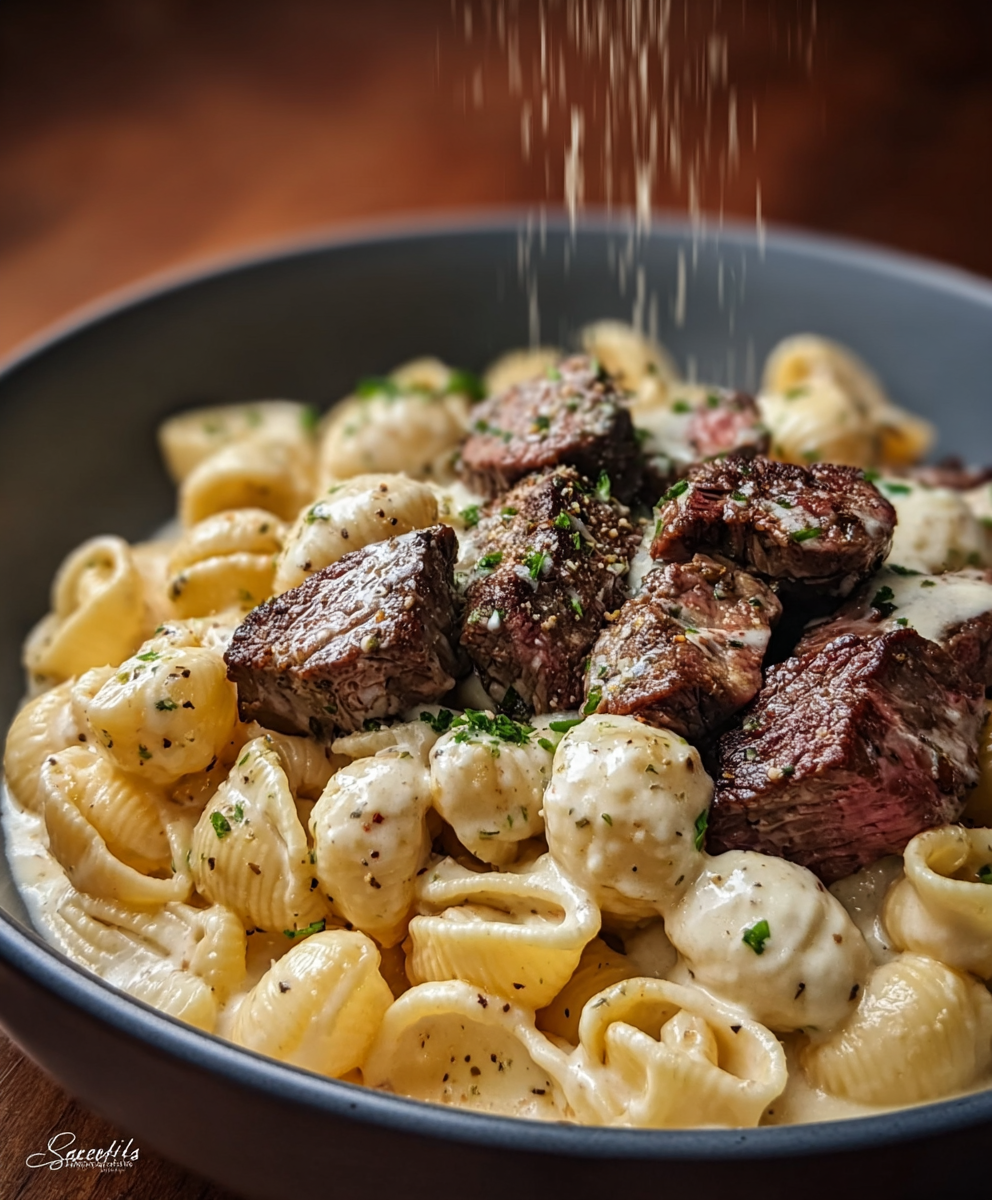
This Crispy Pizza Chips recipe makes perfectly juicy, tender, and flavorful steak every time! Serve with potatoes and a side salad for an unforgettable dinner in under 30 minutes.
Preheat the oven to 425°F and line a rimmed baking sheet with parchment paper to ensure even baking and easy cleanup.
Stack and slice each tortilla into 6–8 wedges with a sharp knife or pizza cutter, then lightly brush with oil if desired and sprinkle garlic powder and Italian herbs.
Arrange wedges in a single layer and bake 5–7 minutes until edges just begin to brown; this step removes excess surface moisture for a crunchy base.
Spoon about 1 to 1 1/2 teaspoons of pizza sauce onto each wedge, add shredded mozzarella, and scatter small, prepped toppings evenly across chips.
Return to the oven for 4–6 minutes until cheese is bubbly and edges are golden; broil 30–60 seconds for deeper color if desired, watching closely.
Let chips cool 2–3 minutes, transfer to a wire rack to maintain crispness, finish with red pepper flakes or fresh basil, and serve warm.
Last Step: Please leave a rating and comment letting us know how you liked this recipe! This helps our business to thrive and continue providing free, high-quality recipes for you.
Leave a comment & rating below or tag
@festive-cooks on social media!

Crispy, golden Parmesan crusted chicken made in the air fryer for a quick family favorite that stays juicy inside and crunchy outside.
A cozy one-skillet mashup of pot pie comfort and egg noodle ease—ready in about 35 minutes and perfect for weeknight dinners.
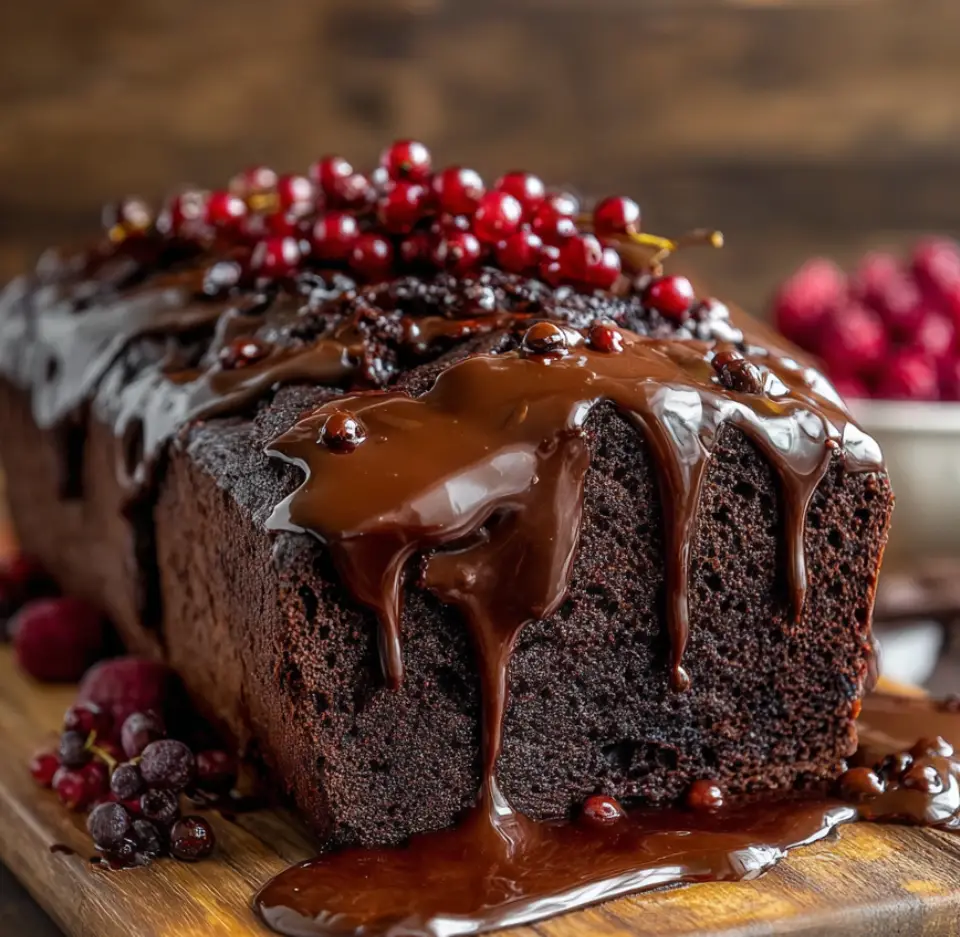
A gooey, chocolate-packed loaf with a molten hot-fudge swirl — brownie texture in bread form, perfect warm with a scoop of ice cream.
Leave a comment & rating below or tag @festive-cooks on social media!
Enjoyed this recipe? Share it with friends and family, and don't forget to leave a review!
This recipe looks amazing! Can't wait to try it.
Comments are stored locally in your browser. Server comments are displayed alongside your local comments.

Join to receive our email series which contains a round-up of some of our quick and easy family favorite recipes.